The Time Loop puzzle in We Were Here Tomorrow requires both players to break four crystals across three time loops. You must complete two recording phases first so their clones can help you solve the final phase.
Player 1 (P1) uses the cube weapon, while Player 2 (P2) uses the suction cup weapon. Each new phase replaces the previous recording, so both players must complete their assigned tasks before the timer runs out.
Credits: This puzzle solution is inspired by VOLCHITSA.
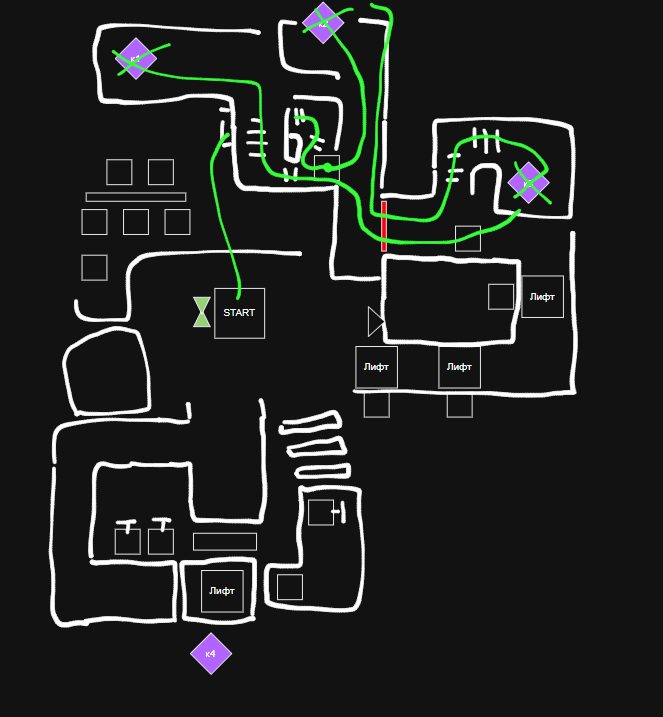
Phase 1: Activate the Six Buttons at Crystal 1
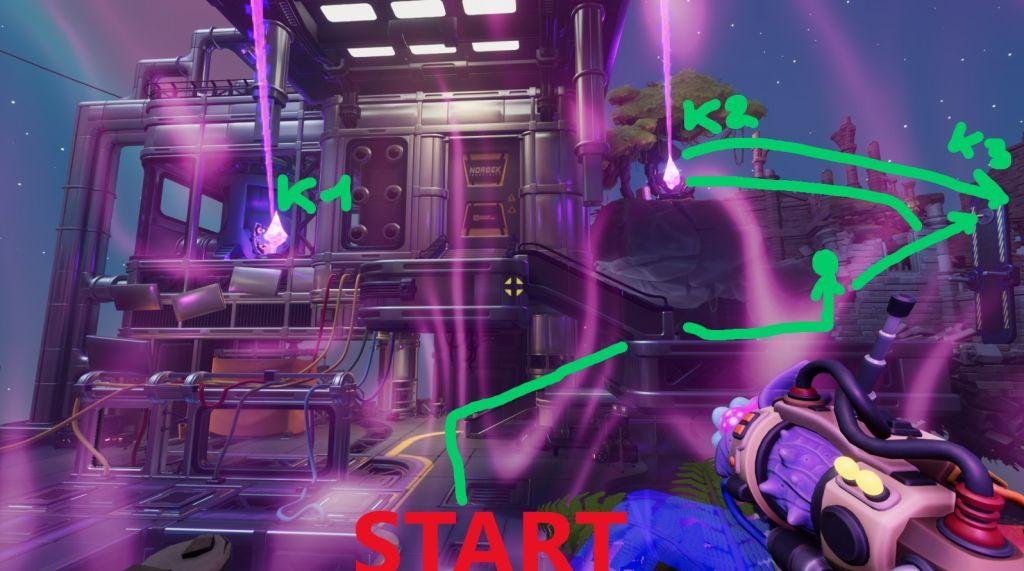
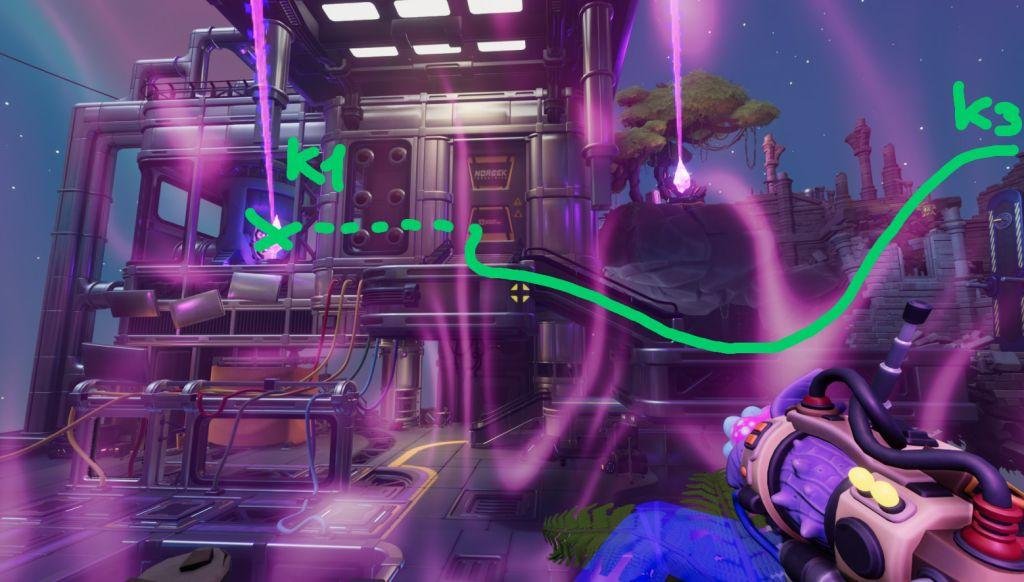
Route Map:
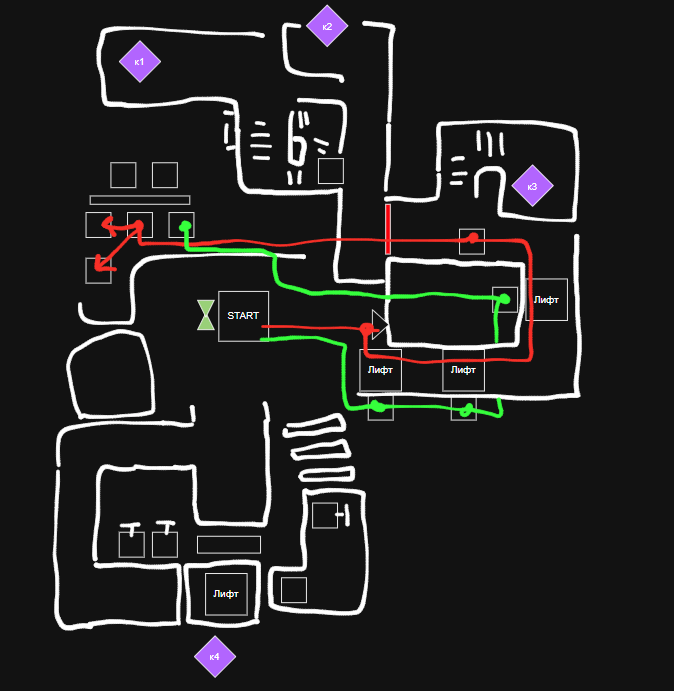
Start this mission by heading toward Crystal 3 (C3). Your main goal is to activate all six pressure buttons near Crystal 1 (C1) and keep them pressed until the phase ends.
Steps for Player 1 and Player 2
Reach the first elevator: Both players will leave the starting point and head toward C3. P1 will place two cubes beside the first elevator to create a step. P2 will wait for P1 to climb up, then activate the elevator to lift their partner.
Cross the elevator section: Continue forward and activate the three elevator buttons along the route. P1 must reach the inside of the castle.
Open the castle door: P1 will place a cube on the button inside the castle to open the door. After that, P1 will run toward C1. P2 should also head toward C1 after activating the final elevator.
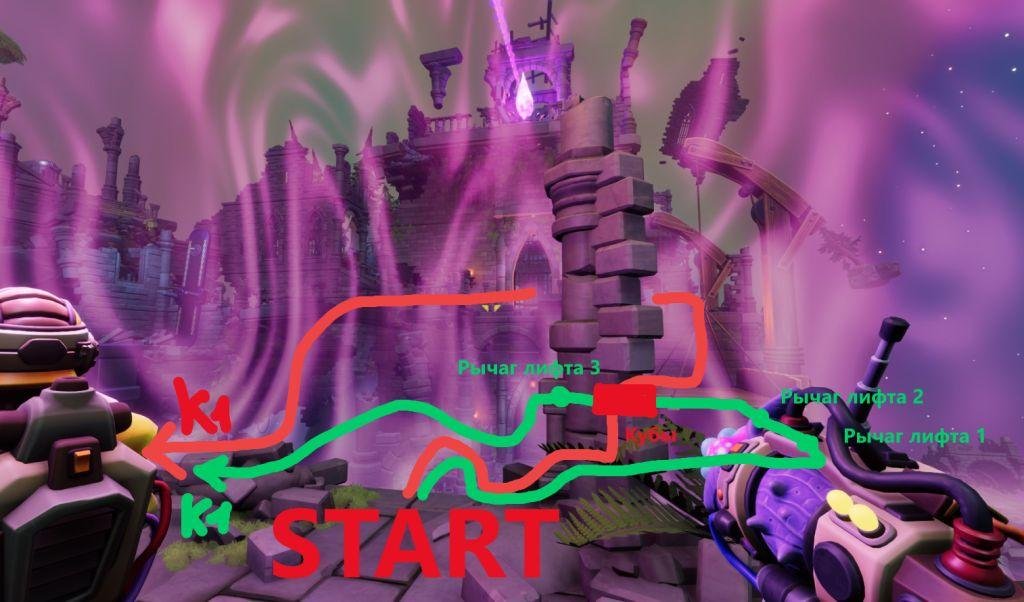
Activate all six pressure buttons: P1 will retrieve the cube from the castle button and use the cubes to press the required buttons near C1. Place the cubes so that six buttons remain activated simultaneously.
Hold the remaining buttons: P1 and P2 will stand on the remaining unoccupied buttons. Both players must stay in position until the phase ends.
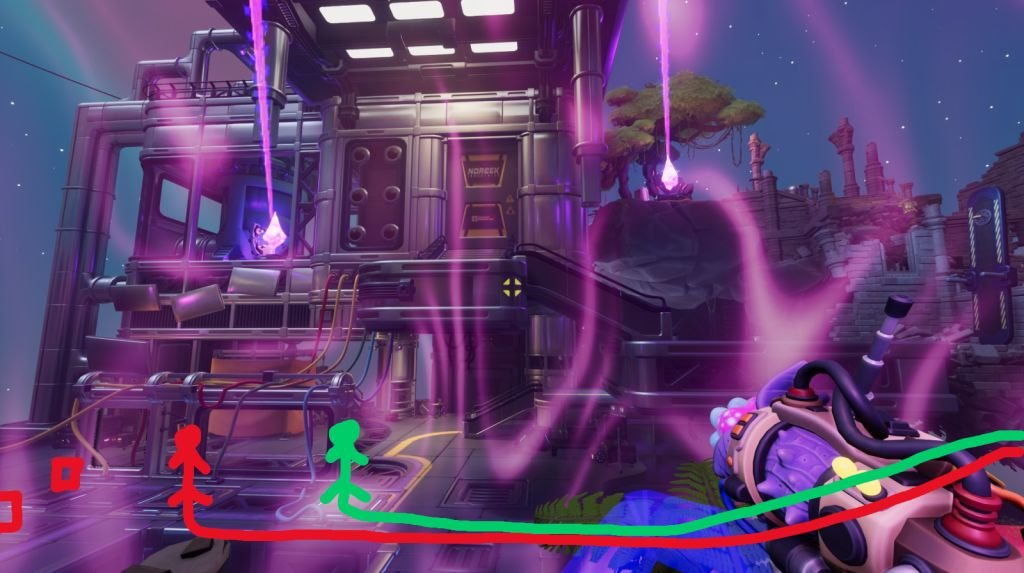
Important: Check that all six buttons are active before the recording finishes. Your clones need to repeat these actions during the final phase.
Phase 2: Prepare the Elevator at Crystal 4
Route Map:
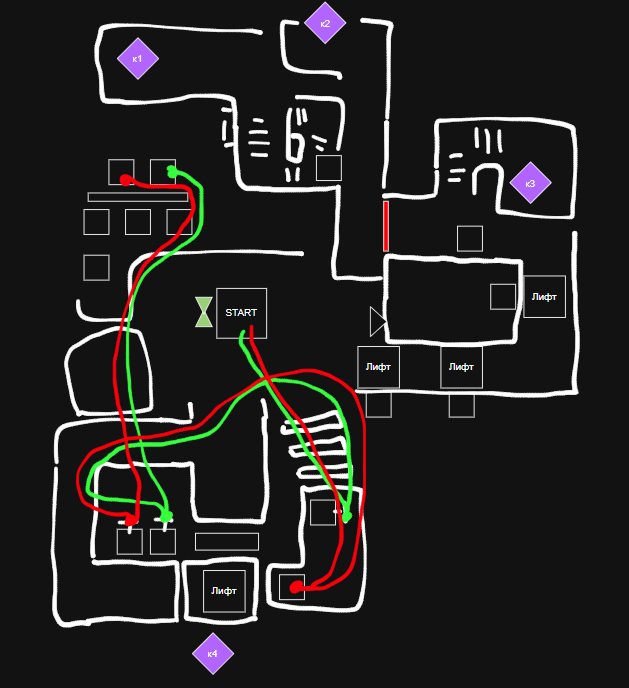
In the second phase, both players will head toward Crystal 4 (C4). You need to record the actions that will help you reach the upper section and open the route toward C1.
Steps for Both Players
Reach Crystal 4: Leave the starting point and move toward C4. Running and jumping across the shard staircase is faster than using the climbing animation.
Activate the canopy: P1 will run ahead and place one cube on the button that activates the canopy. This will create a route to the elevator. At the same time, P2 will pull the lever to open the door.
Operate the elevator levers: Both players will pass through the open door and reach the elevator levers. Pull the levers together and keep holding them until you hear the voice say “THREE.”
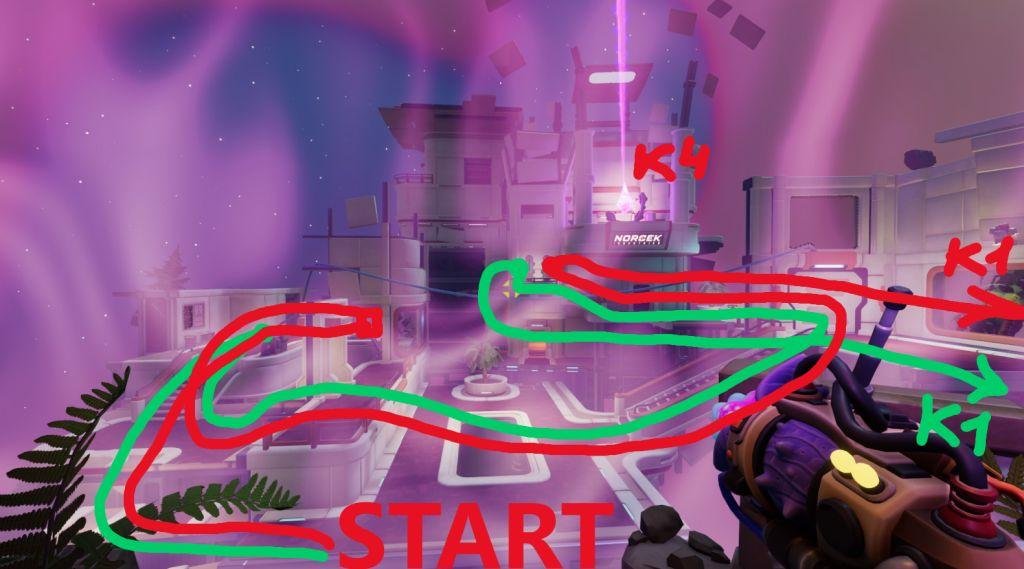
Release the levers together: Once the voice says “THREE,” both players will release their levers at the same time.
Return to Crystal 1: Both players will run toward C1 and stand on the remaining unpressed buttons. Stay on the buttons until the phase ends.
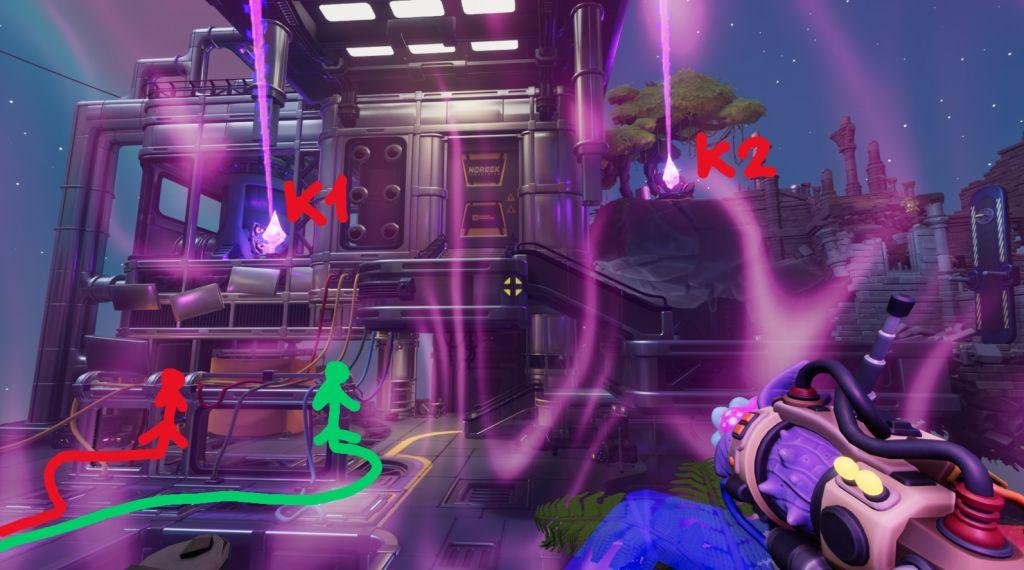
Your first two recordings should now be ready to assist you in the final time loop.
Phase 3: Break All Four Crystals
Route Map:
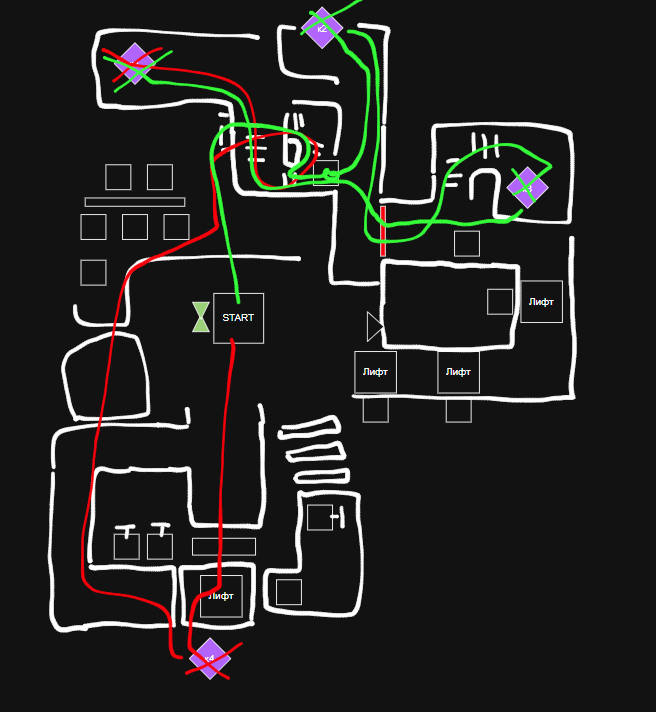
The final phase is where you will use the recorded actions to break the crystals. Your clones will repeat the actions from the previous phases, allowing you to reach areas that would otherwise require more time.
P1 and P2 must follow different routes to break the crystals before the timer expires.
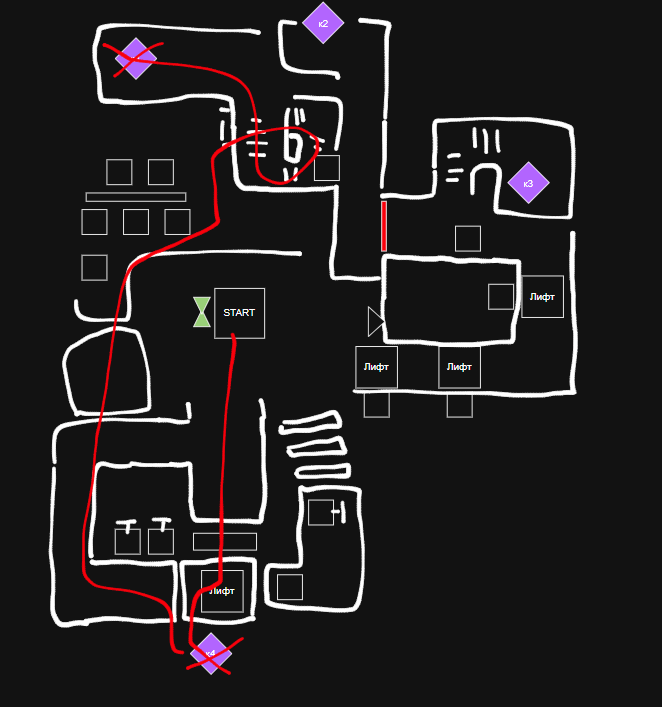
Player 1: Break Crystal 4 and Crystal 1
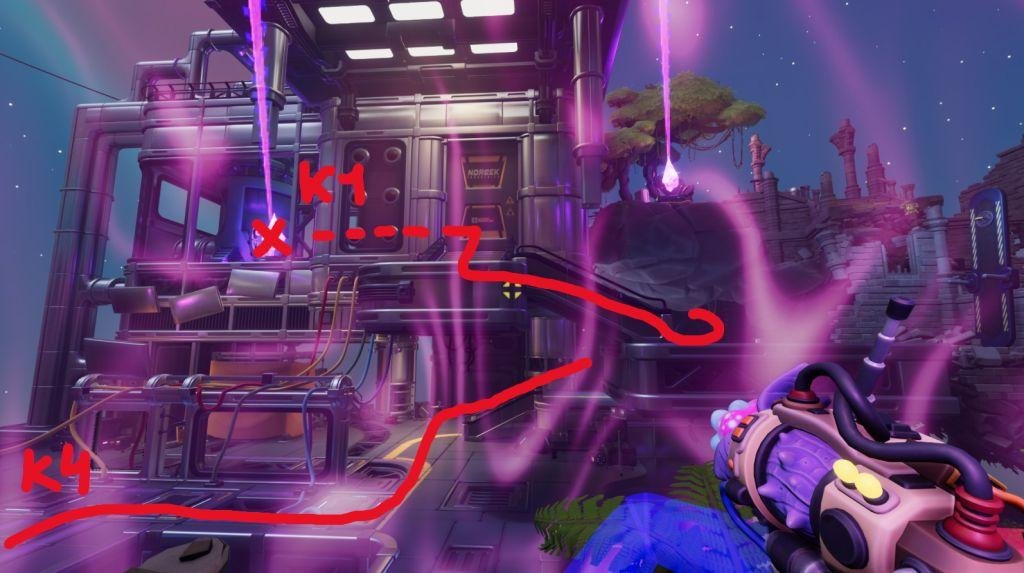
Now P1 will focus on C4 first, then move toward C1.
Run toward Crystal 4: Move through the center of the area and head toward C4.
Use the canopy and elevator: Wait for your clone to activate the canopy. Jump onto it, then enter the elevator.
Reach the upper level: Let the clones operate the elevator and lift you up. Once you reach the correct height, break C4.
Move toward Crystal 1: Jump down and run toward C1. Follow the stone path on the left rather than taking the central route.
Break Crystal 1: Reach the open doorway and attack C1.
Doorway tip: You may encounter an invisible barrier at the open door after climbing the stairs. If your character cannot pass through, jump forward to get past the hidden collision barrier.
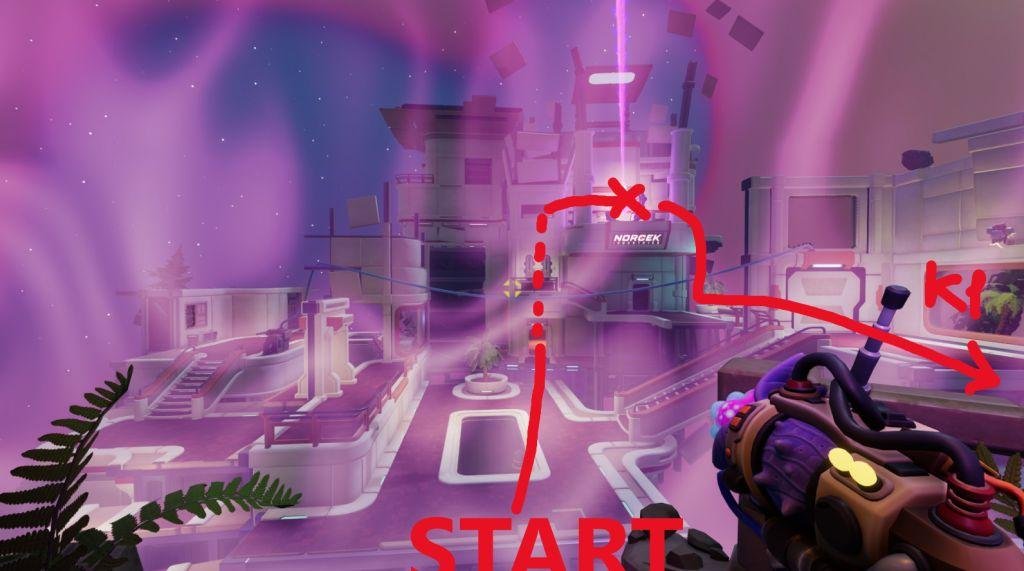
Player 2: Break Crystal 2, Crystal 3, and Crystal 1
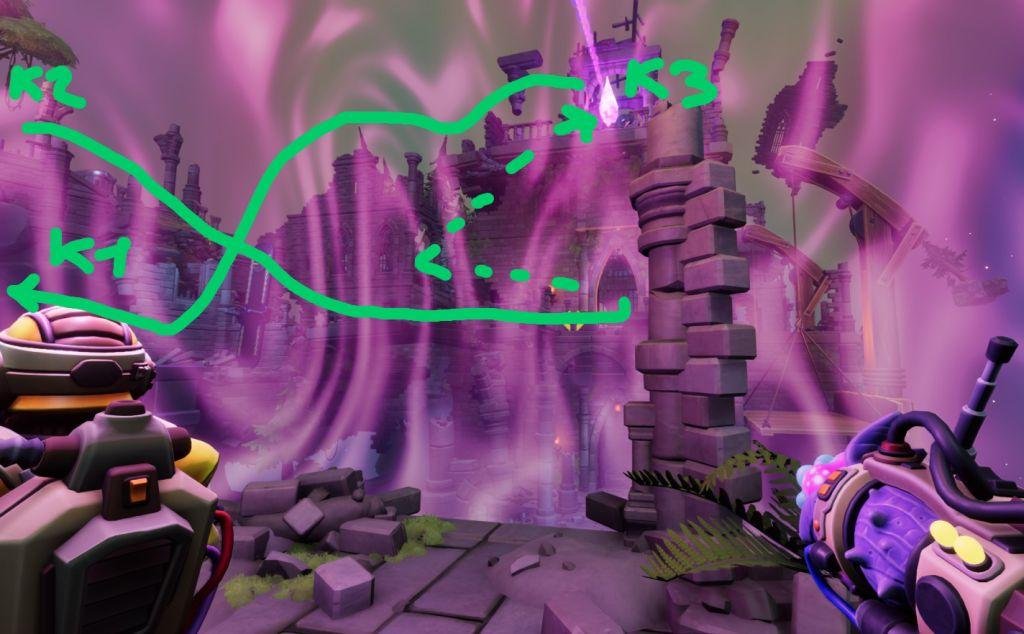
P2 will have a longer route and needs to move quickly between the crystals.
- Reach Crystal 2: Use the suction cup to climb the stairs toward C2. Press F to lower the bridge and open the way forward.
- Use the charged cube: Look to the left for an active charged cube above you. Use it to launch yourself upward.
- Break Crystal 2: Reach the upper area and destroy C2.
- Enter the castle: Go down the stairs toward the castle and run along the balcony. Enter the open door, turn left, and climb the stairs.
- Break Crystal 3: Continue upstairs and destroy C3.
- Return to Crystal 1: Jump down from the area where you broke C3, land on the stairs, and run toward the C1 doorway. Your clones should have opened it already.
- Jump through the doorway: If an invisible barrier blocks your path, jump forward to pass through it. Then break C1.
What If You Fail to Break a Crystal?
You must break all four crystals during the final phase. If you miss a crystal or run out of time, reset the clone recordings using the machine near the starting point. The machine is marked by an hourglass on the map.
Start again from Phase 1 and repeat the same steps.
Remember that each new phase replaces the previous recording. If a phase goes wrong, resetting and recording the actions again is safer than continuing with an incomplete setup.