
Most runs in Welcome to the Game III fail before the real investigation even starts. Players often die because they ignore basic rules, like leaving doors unlocked, missing warning sounds, or activating dangerous traps too soon.
Establishing a good routine is more effective than rushing through darknet sites. Take some time to prepare your motel room, learn the locations of key areas, and gather essential gear before pushing for progress. Once these habits become second nature, surviving the later hours will feel much easier.
This Welcome to the Game 3 walkthrough follows the game’s flow from start to finish. It includes first-night priorities, website schedules, hacking minigames, enemy behaviors, DOS farming methods, motion sensor placements, and other mechanics you’ll encounter in a playthrough.
Welcome to the Game 3 Beginner Walkthrough (First Night Guide)

Your first night isn’t about solving every puzzle. You must get ready before the game starts giving threats to you. If you take the first 20 to 30 minutes to set up properly, the rest of the night will be far easier.
Lock Your Motel Room First
As soon as you take control of your character, lock your motel room door.
Spend a few seconds learning the layout of the room:
- Panic button
- Light switch
- Computer
- Peephole
- Back door
You’ll frequently return here, so knowing where everything is can save time during emergencies.
Search Every Motel Room
Before using the computer, explore the motel.
Your main goal is to gather useful supplies that will help you survive later.
Collect items like:
- One bag of meth for Cletus
- Motion sensors
- Security cameras
- Speed drugs
- Other useful loot
Only carry one meth bag. If you find another, leave it behind and note the location. Carrying multiple bags is generally a waste. Cletus only takes the bag you’re currently holding.
Learn the Motel Layout
One of the easiest ways to die in Welcome to the Game III is by getting lost.
Before continuing, ensure you know where these places are:
- Electrical room
- Internet boxes
- Package pickup spots
- Safe routes around the motel
- Ace of Spades room for Tucker’s chase event
You’ll need to visit these locations repeatedly throughout the game.
Install Motion Sensors
After collecting three motion sensors, set them up before focusing on your progress.
The safest arrangement is:
- Left side of the motel
- Right side of the motel
- Lucas’ back door
This setup will give early warnings for both Tanner and Lucas. This setup will also reduce the surprise attacks.
Start Browsing Dark Web Websites
Once your preparation is complete, head back to the computer and start searching websites.
Focus on:
- Collecting hashes
- Finding clues
- Downloading useful files
- Unlocking new websites
Don’t open every website you discover. Some of them can introduce new dangers.
One website you should avoid early is The Bomb Maker. Whenever you visit it, a new threat is triggered that can slow your progress if you’re still trying to build your setup.
Keep Your Door Locked
Each time you return to your motel room, lock the door right away.
Before going outside:
- Listen for lockpicking sounds.
- Check the peephole.
- Make sure the area is safe.
These few seconds can save an entire run.
Watch the Time
Several websites only show up during specific times.
If you miss one, you’ll need to wait until the next hour to visit again.
While browsing, keep an eye on the clock so you don’t waste precious time.
Don’t Panic During Threats
Every killer gives some kind of warning before attacking.
It could be a sound, a visual cue, or a specific event.
Don’t react randomly to warnings. Learn what each warning sign means. Once you recognize those patterns, surviving becomes much easier.
Early-Game Priorities
Follow this order during your first night:
- Lock your motel room.
- Find one meth bag.
- Learn the motel layout.
- Collect motion sensors.
- Install the sensors.
- Start browsing websites.
- Avoid activating The Bomb Maker.
- Continue progressing while checking timed websites.
Avoid these mistakes during your first few runs:
- Carrying multiple meth bags.
- Forgetting to lock motel room doors.
- Visiting The Bomb Maker too early.
- Sprinting everywhere outside.
- Ignoring timed websites.
- Leaving a motel room without checking the peephole.
- Forgetting where important locations are.
Learn the Important Sound Cues
Most threats can be recognized before they reach you if you know what to listen for.
| Sound | Threat |
|---|---|
| Quiet rustling grass | Tanner |
| Lockpicking sound | Lucas |
| Old-time music | Tucker |
| Quiet ticking | Bomb Maker |
| Short motion sensor beep (around 2 seconds) | Tanner |
| Long continuous motion sensor beep (5–6 seconds or longer) | Lucas |
Using headphones can help you identify these sounds more easily.
Welcome to the Game III Website Guide
Knowing when a website is active matters just as much as finding it. Some sites are available all night, while others are only around for a short time. If you miss one, you’ll have to wait until the next cycle to check again.

This section lists every website by availability, followed by a quick schedule you can use while playing.
Always Available Websites
These websites can be accessed at any time during the night.
- Blushing Brides
- Cavity Lease
- Crisis Calls
- Doctor Murder
- Dont Waste It
- Doughy
- Encrave
- Forever Friend
- Jakobs Sink
- LostTapes
- Oneless
- Prohibited Stockpile
- Red Triangle
- Ring Ring
- Symphoros Chosen
- Synapse Decay
- Tango Down
- Thanks For Visiting!
- The Bomb Maker
- The Hole
- The Light Within
- The Loogaroo
- Time Sharing
- TRACK06
- VoluVision
- World Wide Workers
Timed Websites
These websites only appear during specific parts of each hour.
Available from :00 to :14
- FindLove
- Forsaken Gifts
- Mors N More Market
- Order Of Nine
- The Prey
Available from :00 to :29
- Blackhat Post
- Drug Tickets
- Kill For Me
- MamaBruguglio
- Red Handed
- ViaMarisRoute
Available from :15 to :29
- Building A Future
- Eat My ♥♥♥♥
- Overnight Success
Available from :30 to :44
- Bizzare Propagation
- Crystal Guild
- I Am Here
- Keep Sake
- Shelter
- You There?
Available from :30 to :59
- Chevron
- finalStanding
- Lab Monkey
- The Grey
Available from :45 to :59
- The Hall
Permanently Dead Websites
These websites can no longer be accessed during a normal playthrough.
- Abyssal Chat
- Backrooms
- Bathroom Cams
- Bone Altar
- Carrion Stage
- Corpses For Sale
- Crimson Bazaar
- Crimson Relay
- Dread Signal
- Drone Spy
- Dusk Haven
- Echo Vault
- Eternal Loop
- Evidence Locker
- Father Donald
- Flicker Stream
- Foot Doctor
- Forgive Me
- Ghost Proxy
- Gloom Archive
- Hollow Key
- Iron Ledger
- Iron Mask
- Is Evil
- Lost Signals
- Murk Lair
- Mutilation
- My Gut
- Noir Gallery
- Obsidian Trade
- Pale Market
- Phantom Lot
- Red Veil
- Roses Destruction
- Rust Network
- Secure Drop
- Shade Broker
- Shadow Cache
- Silent Auction
- Specter Hub
- The Black Waves
- The Butcher
- The End Of NY
- Veiled Eyes
- Void Library
- Wraith Cam
Quick Website Schedule
Use this quick reference whenever the in-game clock changes.
| Time | Websites to Check |
|---|---|
| :00 | FindLove, Blackhat Post, Drug Tickets, Kill For Me, MamaBruguglio, Red Handed, ViaMarisRoute, Forsaken Gifts, Mors N More Market, Order Of Nine, The Prey |
| :15 | Building A Future, Eat My ♥♥♥♥, Overnight Success |
| :30 | Bizzare Propagation, Crystal Guild, I Am Here, Keep Sake, Shelter, You There?, Chevron, finalStanding, Lab Monkey, The Grey |
| :45 | The Hall |
Welcome to the Game III Hacking Guide
Hacking attempts increase as you progress. Ignoring them isn’t an option. Each time you successfully defend your computer, you earn DOSCoin, which you’ll need for upgrades later.
Every hacking minigame works differently, so learning the basics early makes them much less stressful.
K3RN3LC0MP1L3R
Objective: Type the highlighted line exactly as it appears on the screen.
Tips
- Focus on accuracy instead of speed.
- Use Backspace for mistakes.
- Later versions ask for multiple lines before the attack ends.
- A few correct entries are better than rushing and making several mistakes.
memDEALLOCATER
Objective: Navigate through the memory block while avoiding red sections.
Each key press moves the memory block down one row and adds a new row at the top.
Controls
- A / Left Arrow – Left side is safe.
- D / Right Arrow – Right side is safe.
- Spacebar – Both sides are safe.
Instead of waiting for the next prompt, look a few rows ahead and plan your moves in advance. This gives you more time to respond when the speed increases.
Correct inputs fill the progress bar, while wrong ones reduce it. Harder versions eliminate the key prompt, so memorizing the controls becomes even more critical.
Quick Tip: Look ahead instead of reacting one row at a time.
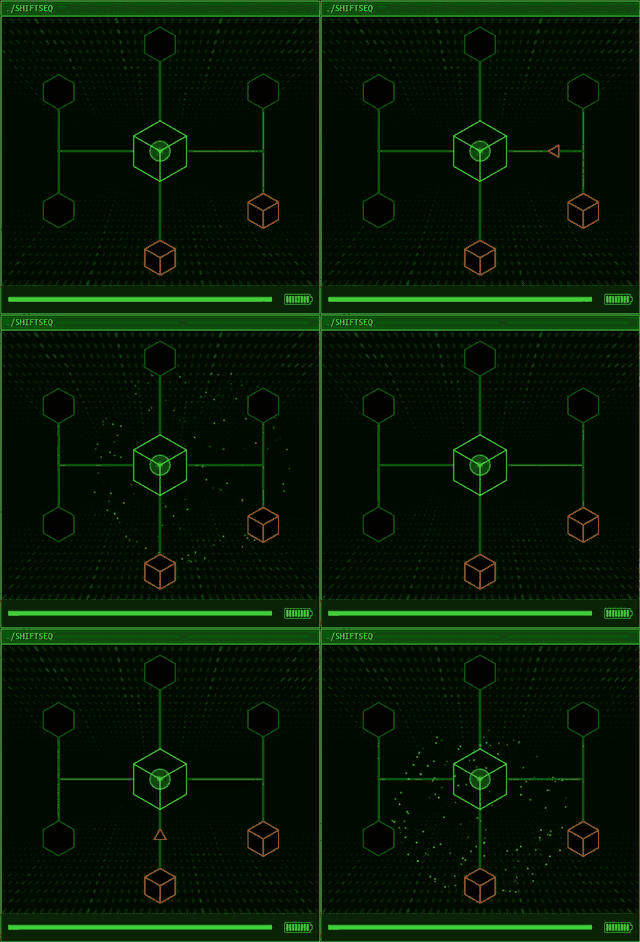
shiftSEQ
Objective: Make sure that all the infected nodes are destroyed before the attack gets to your home node.
The process starts at the home node; then you should go through the network, eliminate the infected nodes, and go back home to recharge each time your energy level drops.
Controls
- W – Move Up
- A – Move Left
- S – Move Down
- D – Move Right
- Spacebar – Attack an infected node or recharge while standing inside the home node.
To destroy an infected node you have to deal it multiple blows, so don’t spend all your energy on targets that are far away.

Tips
- Recharge each time you pass by the home node.
- Clear nearby infections first.
- Don’t leave your home node exposed for an extended period of time.
- Keep an eye on the centre of the network; if the attack gets there while you’re away, your connection health will decrease.
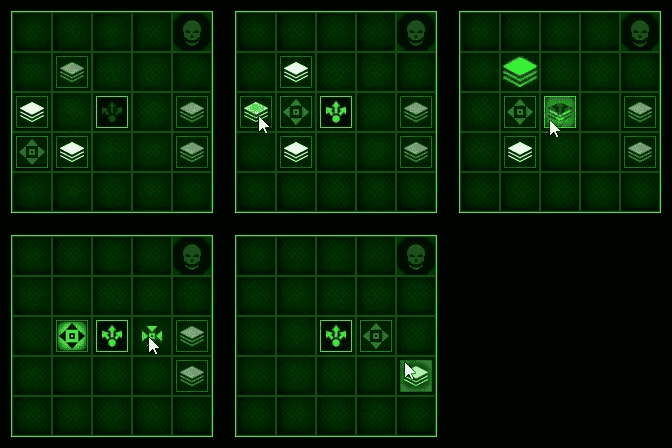
stackPUSHER
Objective: Push every stack node into the popper.
This puzzle is more about planning than speed.
Tips
- Before taking your first action, look at the full layout.
- Do not leave a stack in a position where it cannot be moved.
- Do not push a node onto a skull that is laughing.
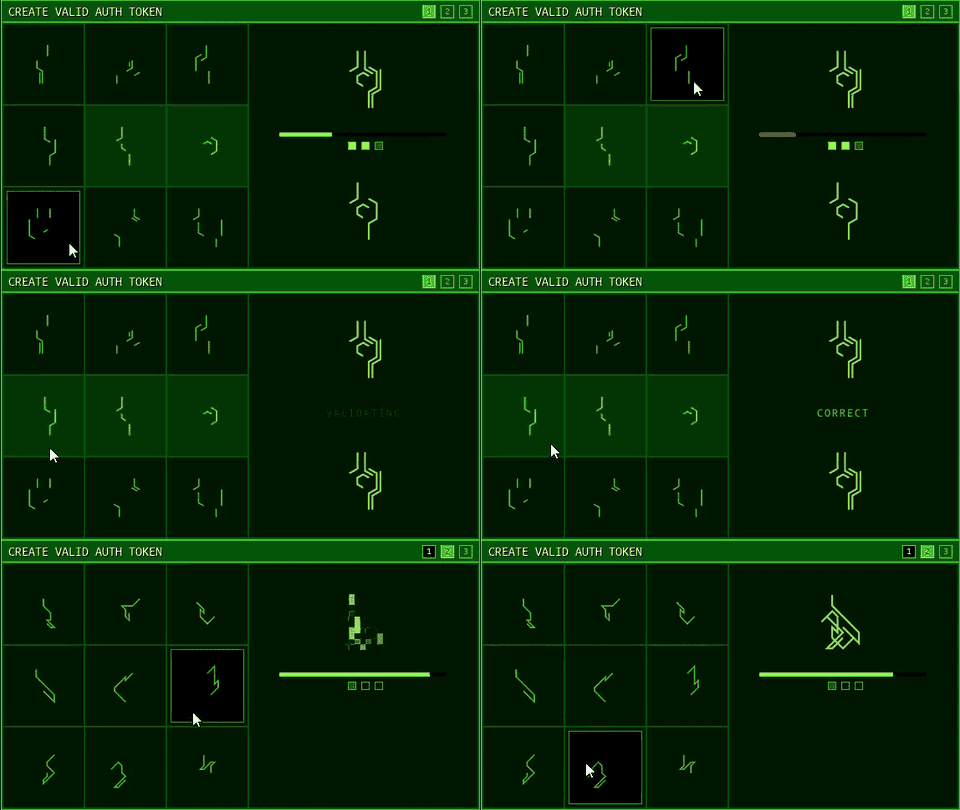
TOKENINE
Objective: Select the right pieces in order to reconstruct the authentication token before the time expires.
At first the puzzle is simple but it becomes more difficult later on since the visual effects cause the pieces to be hard to recognize.
Tips
- Always make a selection before the timer expires.
- Don’t overthink your first choice.
- Later versions are easier if you focus on the overall shape instead of small details.
General Hacking Tips
Since DOSCoin is rewarded whenever a hack defence is successfully carried out, these attacks aren’t all bad news. You’ll gain extra money and at the same time keep your system safe as long as you consistently finish the minigames.
When having trouble with a specific hack, it’s better to carry out a number of runs to get used to its pattern rather than attempting to force your way through it. Once you understand how they work, most of them become a lot easier.
Welcome to the Game 3 Threat Guide
Most deaths in Welcome to the Game III happen because players don’t recognize the warning signs. Every major threat gives you a chance to react, but only if you know what to look or listen for.
Here’s how to survive every major enemy you’ll encounter.
Noir (Myra)

Warning Sign
While you are using the computer, Myra suddenly appears in front of your desk.
How to Survive?
Don’t stand up.
Turn your view away from her and wait until she says:
“Good boy.”
Once she speaks, she’ll disappear on her own.
Extra Tips:
- Keeping your lights off increases the chance of Myra appearing.
- However, darkness also makes Lucas search your room less often, so you’ll need to balance the risk.
Lucas

Warning Sign
A squeaking lock means Lucas has started picking your motel room door.
How to Survive?
Always keep your motel room locked.
If you’ve unlocked the shortcut between the electrical room and the computer room, lock both doors whenever you pass through.
The more time Lucas takes to pick the lock, the more time you will have to get ready.
The Kidnapper
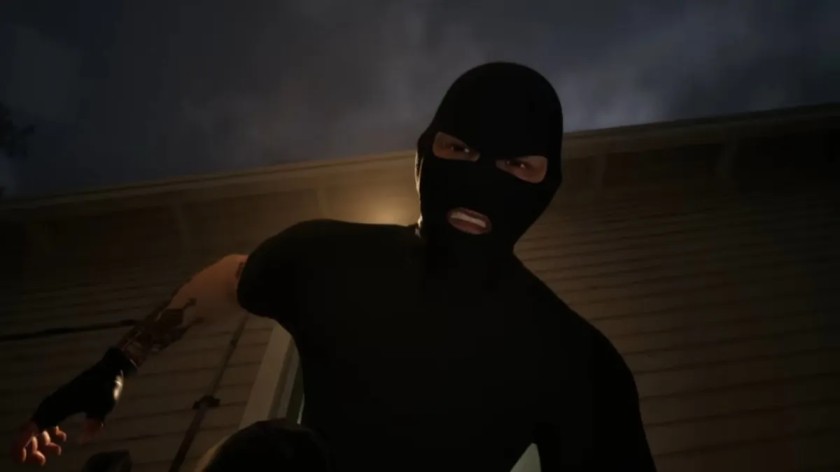
Warning Sign
The white van starts to drive around the motel.
How to Survive?
Once you have seen the van, keep looking at it until it has gone.
Your session can be immediately terminated if you leave some of the safe areas while the van is active.
Extra Tips
- The van is much easier to track if there are two security cameras directed at the utility poles.
- Without cameras, you can sometimes spot it through the motel’s front windows.
- The Kidnapper seems not to appear when there is a red Internet connection or a power outage.
Tanner

Warning Sign
A very quiet rustling sound coming from the grass.
How to Survive?
Always lock motel room doors behind you.
Before opening any motel room door, check the peephole first.
If Tanner is waiting outside, stay inside until he walks away.
Desk Attack
If Tanner tries to open your motel room door:
- Press the panic button once.
- In the first attack, he will hit the door and drop down.
- Later encounters end with Tanner pointing his finger before leaving.
Do not repeatedly press the panic button; recent updates have introduced a penalty for overuse.
Tucker
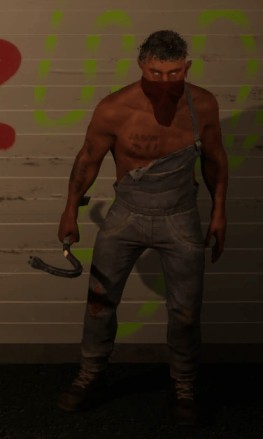
Tucker becomes dangerous when he is near power boxes, Internet boxes, and while he is taking part in his music chase event.
Power Room
When you go into the electrical room, be sure to lock the outside door behind you.
Internet and Power Boxes
After repairing or slapping a box:
- Stay where you are.
- Listen for Tucker arriving.
- Wait until you hear him leave.
It is usually all right to carry on if nothing occurs after about 15 seconds.
Music Chase
If you hear an old-time song playing, stop whatever you’re doing.
Run straight to the motel room marked with the Ace of Spades.
You don’t have very long before Tucker catches you.
Cletus

What Does He Want?
Cletus only wants meth.
How to Prepare?
Check the motel rooms early in the night.
Carry exactly one bag.
If you find more, leave them where they spawned and remember their locations.
It won’t make any difference if you have several bags since Cletus will take all of them.
The Breather
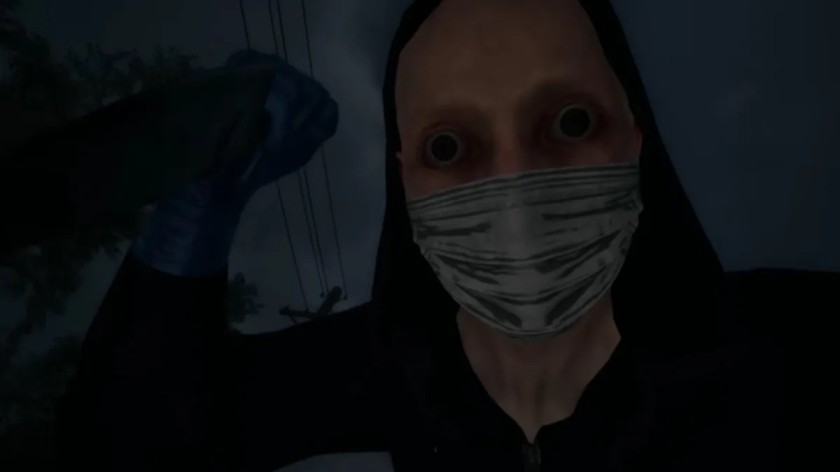
When Does He Appear?
Generally, when you’re straying too far from the motel, in particular during package deliveries.
How to Survive?
Only sprint if you have to.
As soon as The Breather appears, you should quickly run back towards the motel.
Simply getting to the parking lot is usually sufficient to escape.
Speed drugs make this chase much easier.
The Bomb Maker
What Activates Him?
The Bomb Maker won’t become active until you have visited his website.
That’s why many players wait to open it until their progress makes it necessary.
Bomb Mechanics
Once activated, a bomb is hidden somewhere around the motel.
Make sure you find it before the timer runs out.
Input the correct code to disable it.
Common Bomb Locations
- Empty motel rooms
- Behind motel buildings
- Near Wi-Fi boxes
Listen carefully for a quiet ticking sound; usually you will have to get quite close before you can hear it.
If you’re looking around the parking lot and don’t hear anything, then have a look behind the buildings.
Extra Tips
- Before you disarm a bomb, you should leave the lights on in your motel room, since your flashlight will switch off as you enter the code.
- Make sure that there are at least 50 DOS available for emergencies.
- You can still be ambushed by Tucker while you’re searching for bombs.
General Survival Tips
Following a few simple habits makes each run a lot safer.
- Lock every usable door whenever possible.
- Check the peephole before leaving your room.
- Use security cameras to monitor the Kidnapper.
- Remember that lights on reduce Myra encounters differently than lights off affects Lucas.
- Always know where at least one spare meth bag is located.
- Keep some DOS available in case you need emergency purchases.
Welcome to the Game III DOS & Money Guide
DOS is the main currency in Welcome to the Game III, and it is needed if you want to purchase motion sensors, security cameras, software, and other upgrades which can make survival much easier.
There are, in fact, a number of dependable methods of earning DOS without having to rely on luck.
Sell Dark Web Links
Each new darknet website that you find should be saved in your Notes app.
NPCs on CryptChat occasionally ask for website links and will pay DOS in return.
Why It’s Worth Doing?
- Easy source of income
- No risk involved
- Earn money while progressing naturally
If you regularly save new websites, you’ll almost always have something to sell when a request appears.
Sell Downloaded Files
It is possible to find downloadable files on certain websites using ShadowFetch.
NPCs often request these files and usually pay more than they do for website links.
Why It’s Worth Doing?
- One of the best ways to earn DOS
- High payouts compared to most other methods
- Fits naturally into normal progression
Whenever you find a downloadable file, keep it unless you have a reason to delete it.
Mine DOSCoin
Once you have gained access to VirtMesh users, you can use their computers to mine DOSCoin.
Users in higher tiers are able to generate DOS more quickly than those with beginner accounts, so it is worth putting in the effort to upgrade your target.
First-Tier Mining Rates
| User | DOSCoin |
|---|---|
| WebTyk | 1.84 |
| UserJyx | 1.80 |
| NetVorn | 1.45 |
| CloudFuz | 0.88 |
| SysBlip | 0.87 |
| DevQuix | 0.64 |
| DataRax | 0.30 |
Second-Tier Mining Rates
| User | DOSCoin |
|---|---|
| Pheonix | 4.79 |
| OpsHex | 3.23 |
| GameDrux | 2.57 |
| PrintYiv | 2.43 |
| FileNuz | 1.84 |
| VM_Wekl | 1.74 |
| BlackShiv | 1.49 |
| LabBzop | 0.42 |
When you have several mining targets to choose from, you should start with the ones that pay the most.
Defend Against Hacking Attacks
Every successful hacking defense rewards you with DOSCoin.
Rather than viewing hacks as interruptions, consider them as free opportunities to earn some extra money.
Updating your security software also prevents expensive setbacks later.
Gambling
The machine sometimes pays out a large amount of DOS but in a most inconsistent manner.
Pros
- Chance to win big
Cons
- High risk
- Easy to lose everything
- Unreliable income source
It’s best to gamble only when you have more DOS than you currently need.
Best Shopping Priorities
Buying the right upgrades early has a much bigger impact than saving your money.
Buy First
These upgrades provide the biggest improvement to your survival.
- Motion Sensors
- Security Cameras
- Earbuds
- Security Software
It makes it a lot easier to spot enemies, pick up warning sounds, and guard against hacking attempts.
Buy Later
When you have finished putting your basic setup together, begin spending money on upgrades which increase hacking efficiency or aid in locating the puzzle pieces more quickly.
Lowest Priority
Luxury items and gambling should come last.
It is better to concentrate on survival tools when spending money on anything optional.
Money-Saving Tip
Avoid buying upgrades the moment you can afford them. Keeping a small emergency fund is always a good idea, especially after activating threats like The Bomb Maker. Having around 50 DOS available can save your run when an unexpected expense appears.
Welcome to the Game 3 Motion Sensor Guide
Motion sensors are one of the best things you can invest in since a good setup provides you with enough time to react before either Tanner or Lucas gets to your motel room.
If you only have three sensors, use the layout below. It’s reliable and avoids the issues some players have reported with a fourth sensor.
Best 3-Sensor Setup
Sensor 1 – Right Side of the Motel
Purpose: Detects Tanner approaching from the right side.
The sensor provides you with enough time to return inside and get ready before Tanner gets to your door.
Sensor 2 – Left Side of the Motel
Purpose: Detects Tanner approaching from the left side.
Since there are sensors on both sides of the motel, you’ll know from where Tanner is coming and won’t be caught by surprise.
Sensor 3 – Lucas’ Back Door
Location: The back door shown after Wade’s introduction cutscene.
Purpose: To spot Lucas before he begins picking your lock.
This early warning gives you enough time to:
- Turn off the lights.
- Hide if needed.
- Prepare before Lucas reaches the door.
This is why the back door is considered the best location for your third sensor.
Should You Use a Fourth Sensor?
Some players place a fourth sensor near the dumpster beside the fence and network boxes.
Advantage
- Detects Lucas slightly earlier than the standard setup.
Drawback
Several players have reported that this location can cause Lucas to attack much more frequently.
While this isn’t guaranteed to happen every run, it’s generally safer to avoid this placement unless a future update fixes the issue.
How to Tell Tanner and Lucas Apart
The motion sensor doesn’t identify enemies by name, but the alert duration usually tells you who’s nearby.
Short Beep (Around 2 Seconds)
This almost always means Tanner.
When you hear it:
- Get inside your motel room if possible.
- Lock the door.
- Be ready to use the panic button if he rushes you.
Long Continuous Beep (5–6 Seconds or More)
A long alert usually means Lucas.
You’ll normally have enough time to:
- Turn off the lights.
- Stay inside.
- Wait for him to begin lockpicking.
Unlike Tanner, Lucas doesn’t charge your room immediately, so there’s no need to panic.
If You’re Using Four Sensors
The dumpster sensor also produces a short alert, which can make Lucas sound similar to Tanner at first.
If you’re unsure:
- Check the front entrance.
- If Tanner isn’t there, assume the alert is for Lucas.
- You’ll still have enough time because Lucas has to walk from the dumpster to your back door before attempting to pick the lock.
Motion Sensor Quick Reference
| Sensor Location | Detects | Recommended |
|---|---|---|
| Right side of the motel | Tanner (Right) | ✅ |
| Left side of the motel | Tanner (Left) | ✅ |
| Lucas’ back door | Lucas | ✅ |
| Dumpster near the fence | Early Lucas warning | ⚠️ Not Recommended |
Three motion sensors are all you need for a safe setup. Cover both sides of the motel and Lucas’ back door, then learn the difference between the short and long alerts. Once you recognize those sounds, you’ll have much more time to react before either threat reaches you.
Welcome to the Game III FAQ
Even after learning the basics, some questions arise even after you’ve learned the basics. Below are the answers to the questions that players ask most frequently.
Is Gambling Worth It?
Usually, no.
The slot machine can occasionally pay out a large amount of DOS, but the odds aren’t in your favor. It’s too unreliable to use as your main source of income.
If you’re trying to save money for upgrades, it’s better to sell website links, download files or mine DOSCoin.
Should I Always Carry Meth?
Yes, but carry only one bag.
If you only carry one bag, then you’ll be ready when Cletus turns up, since carrying several bags gives you no extra advantage, as he will take all the bags you are holding.
If you find additional bags, leave them where they spawned and remember their locations for later.
Should I Visit The Bomb Maker Early?
No.
The Bomb Maker stays inactive until you visit his website for the first time. Once activated, you’ll need to deal with hidden bombs while continuing your normal objectives.
Unless the story requires it, it’s usually better to postpone activating this threat until you’ve collected useful upgrades like motion sensors and security cameras.
Do I Need to Check Website Source Code?
Yes.
Some websites hide important clues, puzzle pieces, or progression items inside their source code. Skipping it can leave you stuck later in the game.
Whenever you discover a new website, make checking its source part of your routine.
Can I Pause While Using the Computer?
No.
While you are browsing websites, the game does not pause, and the enemies are still able to move about the motel; hacking attempts can start, and the other threats continue to develop in the background.
Stay alert while using the computer, especially if your motion sensors or cameras report activity.


Good call on treating preparation as part of progression rather than rushing the computer. The sections on locking the motel room and placing sensors at both ends are especially useful. I’m building an unofficial WTTG3 guide linked in my name to organize walkthrough, puzzle, character, and ending notes. Full disclosure: it’s my site. I’d be interested to compare how the recommended three-sensor setup changes after future patches.