
Gone Exploring has a few achievements that you can definitely miss in your normal gameplay. Some collectibles also require being moved to specific locations before you escape. Since the exit code changes every playthrough, you can’t use the same code twice.
This Gone Exploring walkthrough shows the exact ways to get every achievement, collectible, and important item that you can’t get in your gameplay.
Know These Things Before Starting Your Game
Keep these tips in mind before exploring the station:
- The 4-digit exit code is randomized in every playthrough.
- If you are carrying too many items, then it can slow your movement.
- Click an item in your inventory to drop it.
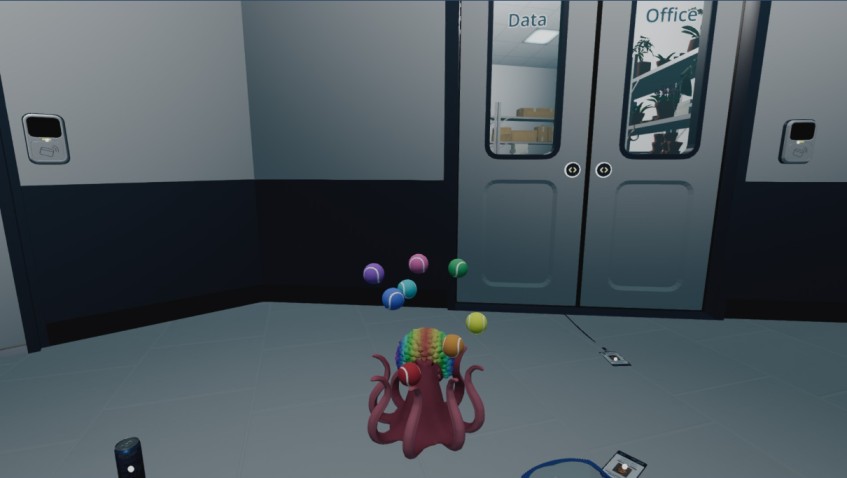
- Drop all 8 balls in the Small Hub Area. You’ll need them later for The Entertainer achievement.
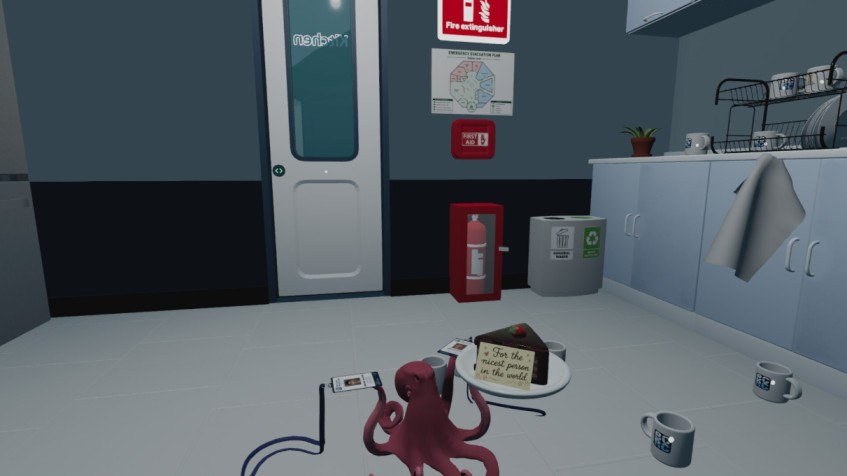
- Drop all 8 mugs in the Kitchen for Nicest Person in the World.
- Carry both keycards whenever possible. However, they slow you down a little, but also saves a lot of backtracking.
- Interact with locked keypads and use the correct keycard to open doors.
Gone Exploring All Achievements & How To Unlock Them
Data Office
Start by searching the Data Office carefully.
Read the note to find the 4-digit exit station code. Note it down because you’ll need it later.
Next, look at the PC desk. You’ll find three cans there. Pick them up and place the correct can into the drink box on the nearby shelf.
Achievement: The Energizer

Objective: Find the source of unlimited energy.
You’ll also find:
- 1 Ball on the PC desks.
- 1 Mug on the PC desks.
Small Hub Area
This room will become your main storage area.
Whenever you find a ball, bring it back here and drop it. By the end of the game, all 8 balls should be in this room.
Achievement: The Entertainer

Collect and place all 8 balls here to unlock:
The Entertainer – 8 balls! Impressive
Crew Room
Many important achievements are hidden inside this room.
Interact with the camera on the left shelf.
Achievement: Selfie Star

Selfie Star – Struck a pose for the camera
Next, click the traffic cone.
Achievement: The Wizard

The Wizard – And got the wizard hat
Now click the cap sitting on top of the chair.
Achievement: The Mystery Solver

The Mystery Solver – Dipper Pines was here
You’ll also find:
- 1 Ball
- 2 Mugs
- 1 Keycard on top of a cabinet
Systems Room
Be careful here. A woman patrols this room, and getting caught can cause problems.
Pick up:
- 1 Ball on the right desk.
- Lever on the right desk.
Keep the lever with you. You’ll need it for the ending.
Staff Only (Big Hub Area)
After entering this section, collect everything before moving on.
You’ll find:
- 1 Ball on the left bench near the entrance.
- 2 Mugs on the table and seating area near the kitchen.
- 1 Keycard on the table.
Kitchen
Bring every mug you’ve collected to the kitchen.
You need to place all 8 mugs here.
Achievement: Nicest Person in the World

After placing all eight mugs, you’ll unlock:
Nicest Person in the World – Here is some cake
Gift Shop
Walk over to the open-mouth shark and interact with it.
Achievement: Business Shark

Business Shark – Found the financial side of ocean research
Chem Lab
Click the middle desk.
Achievement: The Chemist

The Chemist – The centrifuge has been centrifuged
Also collect:
- 1 Ball from the right desk.
Workshop
There are several important items here.
Interact with the measuring tape on the left desk.
Achievement: The Engineer

The Engineer – Measure twice, cut once
Next, interact with the projector on the right shelf.
Achievement: The Historian

The Historian – Uncovered the station’s past
Collect the following items:
- 1 Ball on the left desk.
- 1 Mug on the middle desk.
- Propeller Blade on the right desk.
- Fin on the right desk.
Keep the Propeller Blade and Fin. You’ll use both in the Energy Lab.
Energy Lab
Bring the Propeller Blade and Fin from the Workshop.
Attach both parts to the rocket.
Achievement: The Rocket Scientist

After installing both pieces, you’ll unlock:
The Rocket Scientist – How much astrophage need, question
Also collect:
- 1 Mug
- 1 Ball
Both are on the desks to the right.
Dive Lock
Before leaving, grab:
- 1 Mug
- 1 Ball
Both are on the desk.
Dive Lock Side Room (Ending)
Only enter this room after you’ve finished every achievement and collectible.
- Bring the Lever from the Systems Room.
- Attach it to the mechanism marked PULL DOWN.
- Enter the 4-digit exit station code you found in the Data Office.
- Pull the lever.
Achievement: Free Octopus

Escaping the station will unlock:
Free Octopus – She made it
The Dive Lock Side Room is the final area. Once you use the lever and enter the exit code, the run will end here.
Before escaping, double-check that you have:
- Placed all 8 balls in the Small Hub Area.
- Delivered all 8 mugs to the Kitchen.
- Attached the Propeller Blade and Fin to the rocket.
- Earned every interaction-based achievement.
- Written down the correct exit code from the Data Office.
Achievement Checklist
| Achievement | Requirement |
|---|---|
| The Energizer | Put the correct can into the drink box. |
| The Entertainer | Place all 8 balls in the Small Hub Area. |
| Selfie Star | Interact with the camera in the Crew Room. |
| The Wizard | Click the traffic cone in the Crew Room. |
| The Mystery Solver | Click the cap on top of the chair in the Crew Room. |
| Nicest Person in the World | Place all 8 mugs in the Kitchen. |
| Business Shark | Interact with the shark in the Gift Shop. |
| The Chemist | Click the middle desk in the Chem Lab. |
| The Engineer | Interact with the measuring tape in the Workshop. |
| The Historian | Interact with the projector in the Workshop. |
| The Rocket Scientist | Attach the Propeller Blade and Fin to the rocket in the Energy Lab. |
| Free Octopus | Escape using the lever and the randomized exit code. |
Several achievements can be easily missed because they require clicking an object.
Before leaving each room, make sure you’ve interacted with:
- Camera (Crew Room)
- Traffic Cone (Crew Room)
- Cap on the Chair (Crew Room)
- Shark Display (Gift Shop)
- Centrifuge Desk (Chem Lab)
- Measuring Tape (Workshop)
- Projector (Workshop)
These interactions take only a few seconds but count toward 100% completion in Gone Exploring.