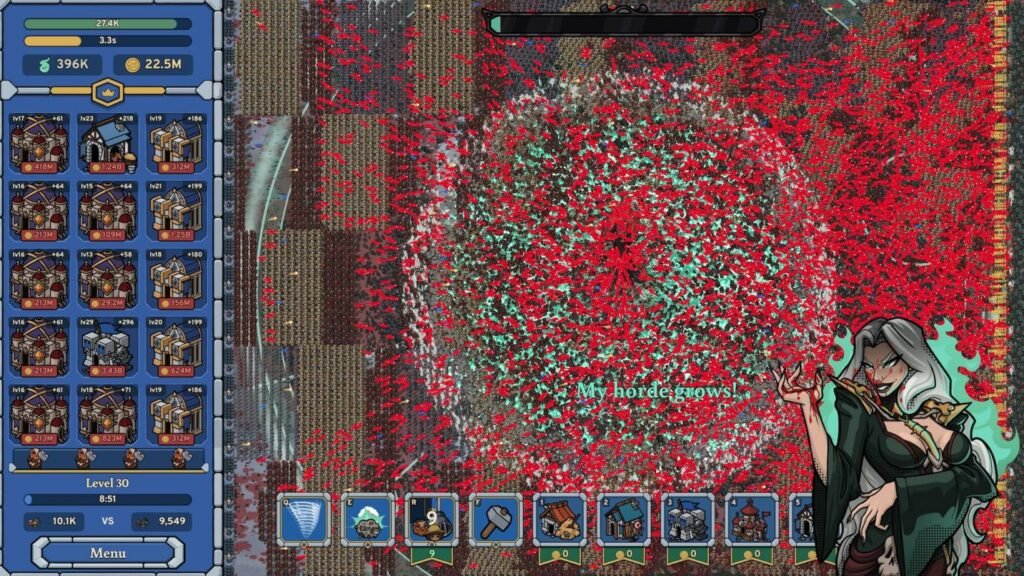
You can unlock all 41 achievements in Here Comes the Horde in around 3–4 hours. Most achievements will be unlocked naturally as you defeat enemies, build your army, and upgrade the Talent Tree. A few require specific castle layouts, combat challenges, and a different strategy for the final boss, Moriana, on Level 30.
There are no missable achievements, as you can replay every stage. This guide covers all Here Comes the Horde achievements, including the required building layouts, Talent Tree upgrades, combat challenges, and the winning setup for Level 30.
Here Comes the Horde – Achievement Overview
| Details | Information |
|---|---|
| Total Achievements | 41 |
| Estimated Time | 3–4 Hours |
| Difficulty | 2/10 |
| Missable Achievements | None |
| Replayable Stages | Yes |
Most of the game is straightforward once you invest enough gold in the Talent Tree. I prefer to unlock all seven building types and their synergy talents before trying to unlock the specific castle layout achievements.
Understanding the Castle Grid and Building Hotkeys
Your castle has a 3-column × 5-row grid, giving you 15 building slots. You don’t unlock these slots individually. Instead, you unlock the seven building types through the Talent Tree.
Each building appears in your bottom toolbar and can be placed using its assigned keyboard shortcut.
| Hotkey | Building | Units |
|---|---|---|
| 1 | Hut | Peasants / Militia |
| 2 | Range | Archers |
| 3 | Barracks | Knights |
| 4 | Tower | Mages |
| 5 | Stable | Cavalry |
| 6 | Chapel | Paladins |
| 7 | Arcane Sanctum | Archmages |
You can also use Numpad keys 1–7.
Important: Complete the required Talent Tree upgrades before attempting the building layouts below. Level 1 or Level 2 is a good place to work on these achievements because enemies put very little pressure on your gate.
Castle Grid Layout Achievements (11)
These achievements require specific building arrangements. Load Level 1 or 2, unlock the necessary synergy talents, and use the following layouts.
Each layout contains 15 positions arranged in three columns and five rows.
- Numbers represent building hotkeys.
- A dot (·) represents an empty slot or a slot that can contain another building.
1. Location, Location, Location
Requirement: Any synergy node.
Move an existing building next to a compatible building. Once their synergy bonus increases the bonus-unit count, the achievement will unlock.
2. One of Everything
Requirement: All seven building types.
Place all seven building types on your castle grid at the same time:
- 1 – Hut
- 2 – Range
- 3 – Barracks
- 4 – Tower
- 5 – Stable
- 6 – Chapel
- 7 – Arcane Sanctum
You only need one of each building.
3. Hut Sweet Hut
Requirement: None.
Fill all 15 castle slots with Huts (Hotkey 1). Once every slot contains a Hut, the achievement unlocks.
4. Personal Space
Talent required: None
Place the buildings in this arrangement so that no two identical buildings touch each other.
Personal Space Layout
[ 1 ] [ 2 ] [ 1 ]
[ 2 ] [ 1 ] [ 2 ]
[ 1 ] [ 2 ] [ 1 ]
[ 2 ] [ 1 ] [ 2 ]
[ 1 ] [ 2 ] [ 1 ]
5. Love Thy Neighbor
Talent required: Be My Neighbor
Place 10 non-Hut buildings next to Huts. Use this layout to meet the requirement.
Love Thy Neighbor Layout
[ 1 ] [ 2 ] [ 1 ]
[ 2 ] [ 2 ] [ 2 ]
[ 2 ] [ 1 ] [ 2 ]
[ 2 ] [ 2 ] [ 2 ]
[ 1 ] [ 2 ] [ 1 ]
6. Social Distancing
Talent required: Lone Rangers
Place five Ranges so that none of them touch each other.
Social Distancing Layout
[ 2 ] [ · ] [ 2 ]
[ · ] [ 2 ] [ · ]
[ 2 ] [ · ] [ 2 ]
[ · ] [ · ] [ · ]
[ · ] [ · ] [ · ]
7. Knight Club
Talent required: None
Fill one complete vertical column with Barracks (Hotkey 3).
Knight Club Layout
[ 3 ] [ · ] [ · ]
[ 3 ] [ · ] [ · ]
[ 3 ] [ · ] [ · ]
[ 3 ] [ · ] [ · ]
[ 3 ] [ · ] [ · ]
8. Higher Education
Talent required: Well-Rounded
Place a Tower (Hotkey 4) with four different neighboring buildings.
Higher Education Layout
[ · ] [ 1 ] [ · ]
[ 2 ] [ 4 ] [ 3 ]
[ · ] [ 5 ] [ · ]
[ · ] [ · ] [ · ]
[ · ] [ · ] [ · ]
9. Stable Relationship
Talent required: Be My Squire
Place a Stable (Hotkey 5) with Huts on all four sides.
Stable Relationship Layout
[ · ] [ 1 ] [ · ]
[ 1 ] [ 5 ] [ 1 ]
[ · ] [ 1 ] [ · ]
[ · ] [ · ] [ · ]
[ · ] [ · ] [ · ]
10. Do the Right Thing
Talent required: Righteous Fury
Fill the entire far-right column with Chapels (Hotkey 6).
Do the Right Thing Layout
[ · ] [ · ] [ 6 ]
[ · ] [ · ] [ 6 ]
[ · ] [ · ] [ 6 ]
[ · ] [ · ] [ 6 ]
[ · ] [ · ] [ 6 ]
11. Hive Mind
Talent required: Great Minds Think Alike
Arrange Arcane Sanctums (Hotkey 7) in a cross pattern.
Hive Mind Layout
[ · ] [ 7 ] [ · ]
[ 7 ] [ 7 ] [ 7 ]
[ · ] [ 7 ] [ · ]
[ · ] [ · ] [ · ]
[ · ] [ · ] [ · ]
Boss, Combat and Challenge Achievements (9)
Some achievements require a particular spell, a large number of enemies, or a specific way of completing a level. The Level 30 boss fight is the biggest challenge in the game.
Before taking on the later stages, check out my Here Comes the Horde Best Archer Build & Wave 1–30 Strategy to learn how to upgrade your Archers and handle enemy waves more effectively.
Here Comes the Sun – Defeat Moriana on Level 30
Achievement: Here Comes the Sun
Moriana on Level 30 can be difficult if you spread your gold across all seven building types. Instead, focus on Chapels and Arcane Sanctums.
The setup below concentrates your upgrades on Paladins and Archmages, giving you a strong frontline and powerful area damage.
Level 30 Winning Layout
[ 7 ] [ 1 ] [ 6 ]
[ 7 ] [ 7 ] [ 6 ]
[ 7 ] [ 1 ] [ 6 ]
[ 7 ] [ 7 ] [ 6 ]
[ 7 ] [ 1 ] [ 6 ]
Follow this building order:
- Place three Huts (Hotkey 1) to help hold back the opening wave.
- Fill the entire far-right column with Chapels (Hotkey 6). This setup uses the Righteous Fury synergy.
- Fill all remaining slots with Arcane Sanctums (Hotkey 7).
Important tip: Don’t leave the castle setup for your Construction Workers to build automatically. Place the buildings yourself. A player reported failing twice because the workers constructed buildings before the intended layout was ready, even when following this strategy.
Use these spells during the fight:
- Tornado: Pull a large group of enemies together so Archmages can hit them with splash damage.
- Sheep Explosion: Clear dense enemy groups before they overwhelm your Paladins.
- Time Warp: Activate it when your Paladin frontline starts getting thin to bring reinforcements faster.
My Queen
On Level 30, attack Moriana until her health bar drops below 10%.
Before your units defeat her, open the Menu in the bottom-left corner and select Surrender. Don’t wait until the final attack lands.
Hold My Crown
Win Level 15 without placing a single building.
Before attempting this challenge, invest gold in:
- Vanguards
- Unit stats
- Spell damage
Start Level 15 and let your existing units handle the enemies. Don’t press building hotkeys 1–7 or place anything on the castle grid.
Above Your Pay Grade
First, purchase the Inspiration talent.
Upgrade one building until it reaches the maximum upgrade allowed by your Construction Workers’ gold limit. Then wait for Inspiration to activate and grant a free upgrade beyond that limit.
Sheep for the Slaughter
You need at least 25 sheep on the battlefield before using Sheep Explosion.
Upgrade both the sheep spawn rate and maximum sheep capacity. Allow enough sheep to gather, then activate the spell to unlock the achievement.
Frequent Flyers
You need Tornado to pull at least 100 enemies at once.
Play a later stage between Levels 25 and 30 and allow a large enemy wave to gather near your frontline. Once enough enemies are together, cast Tornado in the middle of the group.
Blot Out the Sun
Fill all 15 castle slots with Ranges (Hotkey 2).
Upgrade your Archer attack speed and multishot talents. Then wait for a large enemy wave to enter Archer range.
The goal is to have 1,000 arrows in the air at the same time.
Death and Taxes
Purchase the Disposable Income talent early.
This talent helps you accumulate gold over multiple runs. Keep playing until you have earned a total of 100,000 Gold.
A King’s Ransom
Save this achievement for a later stage when you have access to large amounts of gold.
Choose one building and keep spending your gold on its upgrades. Continue until the cost of a single upgrade reaches 1,000,000 Gold or more.
Talent Tree and Milestone Achievements (21)
These 21 achievements are mostly tied to unlocking buildings, purchasing talents, defeating enemies, and reaching specific army-size milestones.
Talent Tree Unlocks (9)
You can unlock the following achievements by purchasing their required upgrades.
| Achievement | Requirement |
|---|---|
| Arrow in the Knee | Unlock Archers |
| Chivalry Isn’t Dead | Unlock Knights |
| Knowledge Is Power | Unlock Mages |
| The Cavalry Is Here | Unlock Cavalry |
| Divine Intervention | Unlock Paladins |
| Unlimited Power! | Unlock Archmages |
| Come Out Swinging | Purchase Charge! and all five Vanguards nodes |
| I Have No Time For This | Purchase Time Warp |
| Maxed Out | Purchase every rank of every Talent Tree upgrade |
For Maxed Out, you need to purchase every available talent rank. Levels 28–30 are good places to farm gold for the remaining upgrades.
Army Size Achievements (4)
These achievements depend on how many units you have on the battlefield at the same time.
| Achievement | Required Units |
|---|---|
| Be My Army | 10 |
| Here Comes the Army | 100 |
| Now Who’s the Horde? | 1,000 |
| We Are Legion | 10,000 |
Keep upgrading your buildings and unit production to increase your army size. The later stages are useful for reaching the higher milestones.
Enemy Kill Achievements (7)
These achievements track your total number of defeated enemies across your runs.
| Achievement | Required Kills |
|---|---|
| Horde of One | 1 |
| No Horde Feelings | 10 |
| There Goes the Horde | 100 |
| Your Horde No More | 1,000 |
| Here Lies the Horde | 10,000 |
| Bye My Horde | 100,000 |
| The Horde Came & Went | 1,000,000 |
You don’t need to complete these in a single stage. Keep playing and defeating waves, and your kill count will increase.
Completionist
Requirement: Unlock all 40 other achievements.
Once you have unlocked the remaining 40 achievements, Completionist will unlock as your final achievement.