

Trying to break into a base in Wardogs? The amount of explosives you need depends heavily on what you are trying to destroy. C4 and IEDs are the perfect choices for buildings & structures, while RPG-7 and MAAWS are better for dealing with vehicles.
This Wardogs Explosives Cheat Sheet gives you the numbers you need for doors, walls, FOBs, Drill Rigs, and other defensive structures. The Frag Grenade and MGL-40 numbers are rough estimates, so I wouldn’t rely on them when trying to break into a base.
Wardogs Building Explosive Requirements
Here is how many hits or explosives each structure takes to demolish. This data is based on the available testing:
| Building | C4 | IED | RPG-7 | MAAWS | MGL-40 | M67 Frag |
|---|---|---|---|---|---|---|
| Door | 1 | 1 | 1 | 1 | 3 | 3 |
| Gate | 1 | 1 | 2 | 4 | 25 | ~25 |
| HESCO Wall (Large) | 4 | 2 | 7 | 8 | 15 | ~10 |
| HESCO Wall (Small) | 2 | 1 | 4 | 4 | 12 | 6–7 |
| Bremer Wall | 7 | 5 | 12 | 12 | 50 | ~50 |
| Sandbags | 1 | 1 | 1 | 1 | 7 | ~7 |
| Barbed Wire | 1 | 1 | 1 | 1 | 3 | 2 |
| Hedgehog | 6 | 3 | 8 | 9 | 100 | ~100 |
| L81 Mortar | 3 | 2 | 4 | 4 | 34 | 34 |
| Stingray | 3 | 2 | 4 | 4 | 34 | 34 |
| Vanguard CIWS | 3 | 1 | 7 | 7 | 50 | 50 |
| Talon 9K-SAM | 1 | 4 | 4 | 4 | 34 | 34 |
| Forward Operating Base | 5 | 1 | 6 | 6 | 50 | 50 |
| Drill Rig | 2 | 1 | — | — | — | — |
The frag grenade values are approximate because the placement of your grenade can affect the damage. MGL-40 and M67 Frag Grenades also require many more shots than the other options, so I don’t recommend them when you are trying to breach a base.
C4 Is the Best Choice for Base Breaching
For normal base structures, C4 is the best explosive to carry and use. It is throwable, easy to carry, takes less space, and it also works against most structures.
A basic breach can be very cheap:
- Door: 1 C4
- Gate: 1 C4
- Small HESCO Wall: 2 C4
- Large HESCO Wall: 4 C4
- Bremer Wall: 7 C4
- FOB: 5 C4
- Drill Rig: 2 C4
You can also carry IEDs as an extra option, especially if you want to completely disable an FOB or Drill Rig.
Also remember that Halligan Bars can save explosives when several doors are blocking your route. This can matter when an FOB is inside or on top of an apartment building.
Building Damage Per Explosive
If you want to mix different explosives, these are the approximate damage values for each one:
| Building | C4 | IED | RPG-7 | MAAWS | MGL-40 | M67 Frag |
|---|---|---|---|---|---|---|
| Door | 100 | 100 | 100 | 100 | 40 | 40 |
| Gate | 100 | 100 | 68 | 25 | 4 | 4 |
| HESCO Wall (Large) | 28 | 53 | 15 | 14 | 7 | 12 |
| HESCO Wall (Small) | 50 | 100 | 26 | 26 | 9 | 17 |
| Bremer Wall | 15 | 21 | 9 | 9 | 2 | 2–3 |
| Sandbags | 100 | 100 | 100 | 100 | 14 | 14 |
| Barbed Wire | 100 | 100 | 100 | 100 | 40 | 80 |
| Hedgehog | 17 | 37 | 13 | 12 | 1 | 1 |
| L81 Mortar | 33 | 50 | 28 | 25 | 3 | 3 |
| Stingray | 33 | 50 | 28 | 25 | 3 | 3 |
| Vanguard CIWS | 40 | 100 | 16 | 15 | 2 | 2 |
| Talon 9K-SAM | 100 | 25 | 28 | 25 | 3 | 3 |
| Forward Operating Base | 22 | 100 | 18 | 17 | 2 | 2 |
| Drill Rig | 60 | 100 | — | — | — | — |
How Explosives Work Against Vehicles
Vehicles are different from buildings. A vehicle can become immobile before it is destroyed.
The vehicle’s health bar appears near the bottom of the screen, but that bar does not show which part of the vehicle has been damaged. You can see the actual damage in the engine.
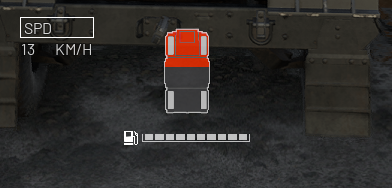
Tires and tracks have their own health bars. If you destroy them, the vehicle can be slowed down, and destroying the right components can completely disable tanks.
Where to Hit Vehicles
Explosives can do more damage to the engine when they land closer to the engine. For most vehicles, this means the front.
The L2A6 Tank and SPH-2 Artillery tank are exceptions because their engine placements are different from other vehicles.
A single explosive placed at the back of a tank can immobilize it. This can be done with:
- C4
- IED
- RPG-7
- MAAWS
AT mines are also very effective against vehicles. A vehicle that drives over an AT mine can be destroyed with one charge, with the L2A6 Tank being the exception.
An L2A6 can survive the mine and keep moving. However, if it backs over an AT mine, it will start burning and may be destroyed if nobody repairs it.
L2A6 Tank Armor
The L2A6 Tank has an extra armor layer on the front. You can see this as a yellow layer above its normal health bar.
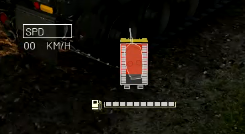
If you fire RPG-7 shots at the armor, they will do less damage, while MAAWS can destroy it in just two shots.
So we can assume that the MAAWS is more useful against the L2A6 than its building damage numbers might suggest.
RPG-7 vs MAAWS for Vehicles
- MAAWS: 1 shot can destroy a Humvee from the side or front.
- MAAWS: can destroy a tank in 1 shot.
- RPG-7: takes 3 shots to destroy a Humvee.
- RPG-7: takes 4 shots to destroy a tank from its weak spots.
- Drill Rig: can be destroyed with 3 RPG-7 shots.
C4 and IED Vehicle Damage Can Vary
Sometimes, C4 and IED placement can be inconsistent against vehicles. In a test, I found that a single C4 can destroy a URAL, while another attempt required two C4s just to disable its engine.
Because of that, the RPG-7 is a more practical choice for moving vehicles. It is easier to use at range, and you do not have to get close enough to place an explosive.
AT mines are also useful for prepared positions because they trigger automatically when a vehicle drives over them. On the other hand, IEDs need manual detonation and give a warning before they go off.
What Explosives Should You Carry?
For a normal base raid, you should consider C4 as your main choice. It gives you good damage against structures while taking less space in your inventory.
Here is my recommended setup:
- C4: Main explosive for doors, gates, walls, and base structures.
- IED: Extra explosives for destroying an FOB or Drill Rig.
- RPG-7: For vehicles and longer-range attacks.
- MAAWS: For the L2A6 Tank.
- AT mines: For defending against or stopping vehicles.
- Halligan Bar: When several doors are blocking your way.