
You may find some puzzles in The Mermaid Mask that can be solved easily, while others can leave you wandering around for quite a while. Even if you’ve explored every room, you may miss a clue that is usually hidden inside a note, painting, or conversation.
In this guide, I have given the solutions to all the Mermaid Mask puzzles that are currently available in the game. You’ll also learn the location of each puzzle, how they work, the exact solution, and the reward you will receive after solving them. I’ve also included important story requirements whenever a puzzle doesn’t appear immediately, so you won’t waste time searching for something that’s still locked.
Warning: This guide contains major story spoilers for The Mermaid Mask.
The Mermaid Mask All Puzzle Rewards
| Puzzle | Location | Reward |
|---|---|---|
| Serpent Statue Cabinet | Mess Hall | Sun Tablets |
| Perfume Shelf | Dream Chamber | Bookshelf Unlock |
| Wooden Chest | Child’s Room | Glass Eyeball |
| Electrical Switchboard | Control Room | Captain’s Log |
| Model Town | Captain’s Quarters | Film Reel |
| Pig Safe | Symmetry & Sinthia’s Bunk | Underwater Photo |
| Phone | Dirk & Wirman’s Bunk | Phone Access |
| Typewriter | Dirk & Wirman’s Bunk | Handwritten Letter |
| Compasses | Engine Room | Ocean Map |
| Pin Board | Cargo Hold | Moon Photo |
| Diving Helmet | Airlock Grotto | Pocketbook |
| Switch | Bilge | Bilge Access |
| Wooden Panel | Illusion Theater | Lifesize Doll & Film Projector |
| Mushroom Puzzle Box | Cargo Hold | Dictaphone Tape |
| Electronic Panel | Control Room | Handheld Radio |
| Treasure Chest | Dome Tank | Ocean Treasure |
| Skull Shelf | Cabinet of Curiosities | Mermaid’s Tongue |
The Mermaid Mask All Puzzle Solutions
Before solving the puzzles, keep these things in mind:
- Talk to every character whenever a new dialogue appears on your screen. Some puzzles may stay locked until you complete the conversation.
- Make sure to read every note, letter, painting, and item description. Many puzzle answers hide in plain sight.
- Search each room carefully before thinking that you’ve missed an item.
- Keep important story items like the Glass Eyeball, Captain’s Log, and Film Reel. You’ll need them later.
- Some puzzles don’t have a single fixed solution. If your answer seems close, experiment with different combinations instead of leaving the area.
Below are the solutions for every puzzle in The Mermaid Mask game.
Serpent Statue Cabinet (Mess Hall)
Location: Click the serpent statue mounted on the wall inside the Mess Hall.
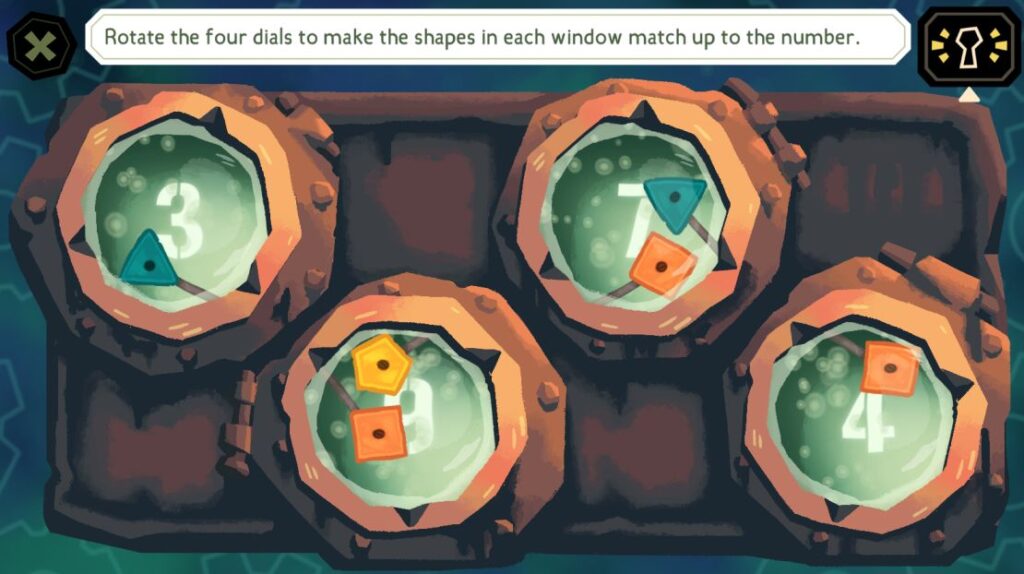
This is one of the first logic puzzles you’ll face in the game. Four rotating dials control four numbered windows. Each window must display a shape with the same number of sides as the number shown.
For example:
- 5 = Pentagon
- 3 = Triangle
- 4 = Square
Solution:
Rotate the dials in this order:
- Turn the first dial until the second window shows a Square.
- Turn the second dial until:
- the first window shows a Triangle
- the third window shows a Square
- Turn the third dial until:
- the second window shows a Pentagon
- the fourth window shows a Square
- Turn the fourth dial until the third window shows a Triangle.
When every numbered window matches the correct polygon, the cabinet will unlock automatically, and you’ll get your reward for finishing the puzzle.
Reward: Sun Tablets
Perfume Shelf (Dream Chamber)
Location: Inspect the perfume shelf against the back wall of the Dream Chamber.
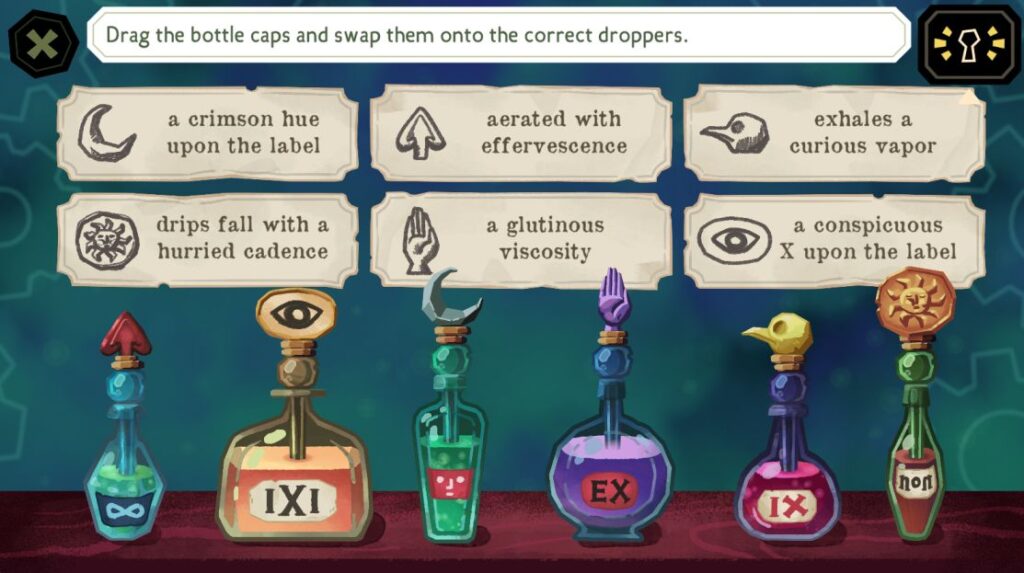
This Mermaid Mask puzzle asks you to pair each dropper with its correct perfume bottle. The labels provide clues, but you’ll also need to inspect the bottles because several hints describe the liquid instead of the label.
Solution:
Match the droppers using these clues:
- Bottle 1: Contains an aerated liquid with bubbles.
- Bottle 2: Has a large X on its label.
- Bottle 3: Has a crimson-colored label.
- Bottle 4: Contains a thick, sticky liquid.
- Bottle 5: Gives off a strange vapor.
- Bottle 6: Drips very quickly.
Place every dropper on the matching bottle to complete the puzzle.
Reward: Bookshelf Unlock
Wooden Chest (Child’s Room)
Location: Click the wooden chest in the lower-left corner of the Child’s Room.
The clue carved into the chest says:
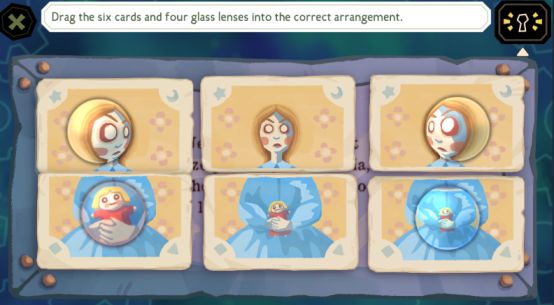
“Jennifer and Margaret gaze jealously at Patricia, whose doll is neither too large nor too small.”
You’ll need to arrange the cards and use the special lenses correctly.
Solution:
- Arrange the three cards so they form three girls.
- Place both warping lenses so the girl on the left and the girl on the right are looking toward the girl in the center.
- Put the shrinking lens on one outside girl’s doll.
- Put the enlarging lens on the other outside girl’s doll.
It doesn’t matter which side gets the shrinking or enlarging lens. The important part is that Patricia’s doll stays its normal size.
When everything is placed correctly, the chest will open.
Reward: Glass Eyeball
Electrical Switchboard (Control Room)
Location: Inside the Control Room, inspect the electronic equipment and open the switchboard in the lower-right corner.
You won’t reach this puzzle immediately. To unlock this puzzle, complete these story steps first:
- Speak with Captain Sinthia Seafoam through the Parlor door.
- Talk to Symmetry in the Child’s Room.
- Return to Sinthia and confirm that you’ve spoken with Symmetry.
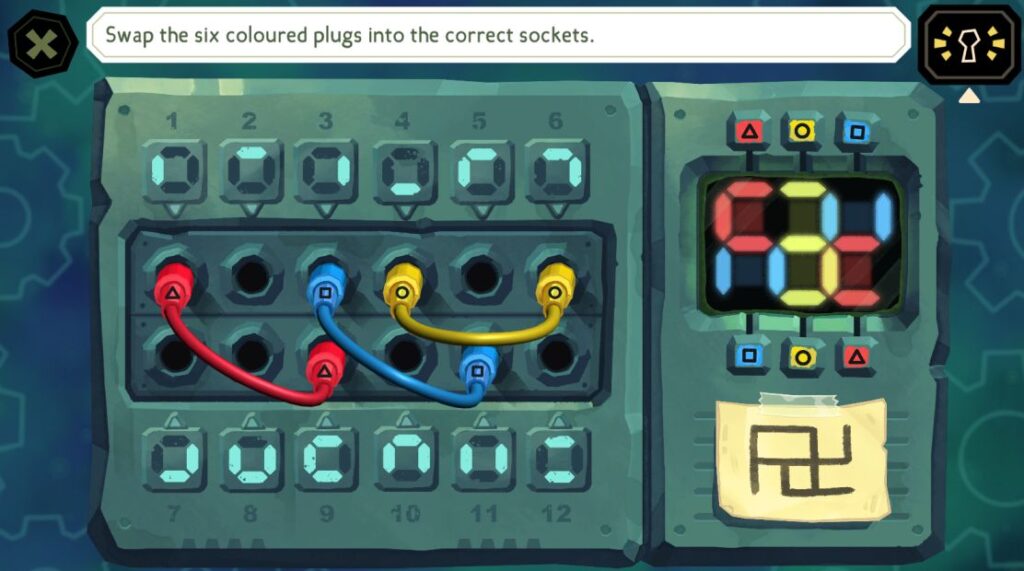
The switchboard puzzle requires you to connect each colored plug to the correct pair of sockets.
Solution:
Insert the plugs into these socket pairs:
| Plug | Correct Sockets |
|---|---|
| 🔺 Red | 1 and 9 |
| 🟡 Yellow | 4 and 6 |
| 🟦 Blue | 3 and 11 |
Once every plug is connected correctly, the pattern will light up.
Reward: Captain’s Log
Model Town (Captain’s Quarters)
Location: Open the chest on the right side of the Captain’s Quarters.
Before reaching this puzzle, you’ll need to complete several story steps:
- Solve the Wooden Chest puzzle to get the Glass Eyeball.
- Show the eyeball to Zephyr.
- Enter the Captain’s Cabin.
- Find the HER Painting clue.
- Ask Sinthia about the painting.
- Return to the painting and rotate the circle at the top to unlock the Captain’s Quarters.
The Model Town puzzle is inside the chest.
How It Works
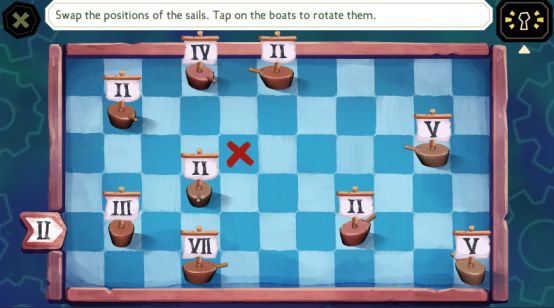
Your objective is to build one continuous route through the town until it reaches the red X.
Every sail displays a Roman numeral. That number tells you how many spaces the path travels before connecting to the next boat, so pay attention to every sail before rotating the boats.
Solution
- Rotate each boat until its route connects to the next section.
- Adjust the sails whenever necessary.
- Follow the Roman numeral on each sail to determine the travel distance.
- Continue until the route reaches the red X without breaking.
If the path stops before the destination, rotate nearby boats again until every connection lines up correctly.
Reward: Film Reel
Pig Safe (Symmetry & Sinthia’s Bunk)
Location: Inspect the pig-shaped safe inside Symmetry & Sinthia’s Bunk Room.
This puzzle will only unlock when you’ve spoken with both Symmetry and Captain Sinthia at least one time.
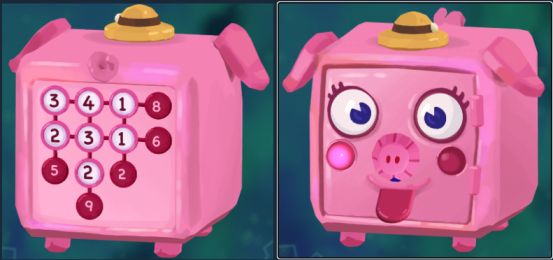
The pig has several clickable parts, including the hat, eyes, cheeks, nose, and tongue. Every click changes the number grid on the back of the safe. Your goal is to make every row and column match the target values shown around the edges.
Solution:
Starting from the puzzle’s default position, make these changes:
- Click the hat 3 times.
- Click the left eye 2 times.
- Do not click the right eye.
- Click the left cheek 1 time.
- Do not click the right cheek.
- Click the nose 2 times.
- Click the tongue 1 time.
Once all totals match the required numbers, the safe will open.
Reward: Underwater Photo
Phone (Dirk & Wirman’s Bunk)
Location: Inspect the phone beside the tuxedo in Dirk & Wirman’s Bunk.
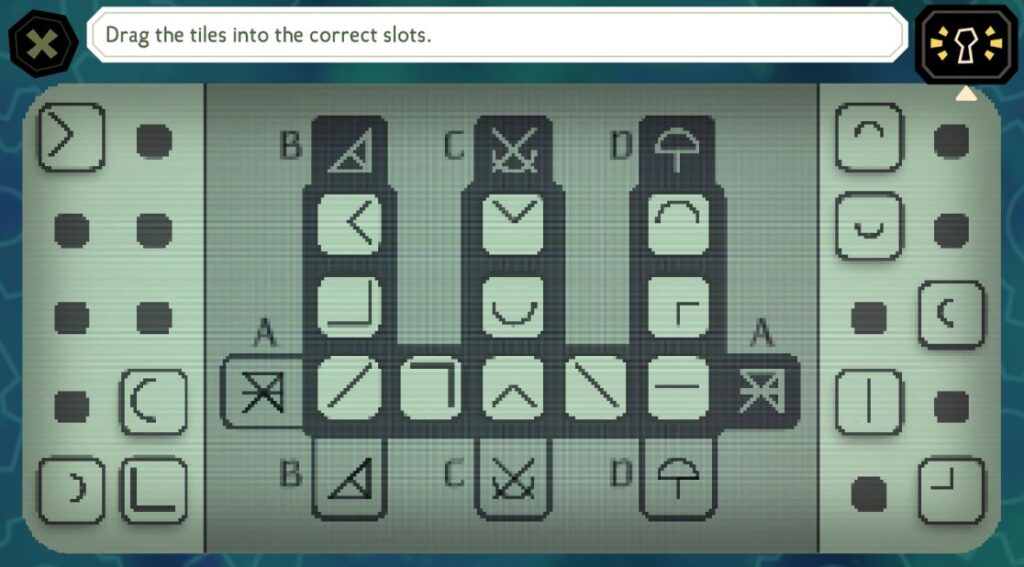
This puzzle revolves around symbols instead of numbers. Every symbol piece belongs to both a row and a column, so moving one piece can affect multiple patterns.
Unlike several earlier puzzles, there isn’t a fixed click sequence here. The challenge comes from arranging every symbol correctly.
Solution:
- Drag each symbol into the correct slot.
- Match the symbol shown at the bottom of every column.
- Keep checking the rows because several symbols are shared across multiple patterns.
- Continue adjusting the layout until every row and column displays the correct pattern.
Unlike some other puzzles, there isn’t a simple click sequence here. The solution comes from arranging every symbol into its proper position.
Reward: Access to the Phone
Typewriter (Dirk & Wirman’s Bunk)
Location: Inspect the typewriter in front of Wirman.
This puzzle looks confusing at first because each pattern is slightly rotated relative to the previous one.
Your goal is to recreate the same design, but with the symbols rotated into a new orientation.
Solution:
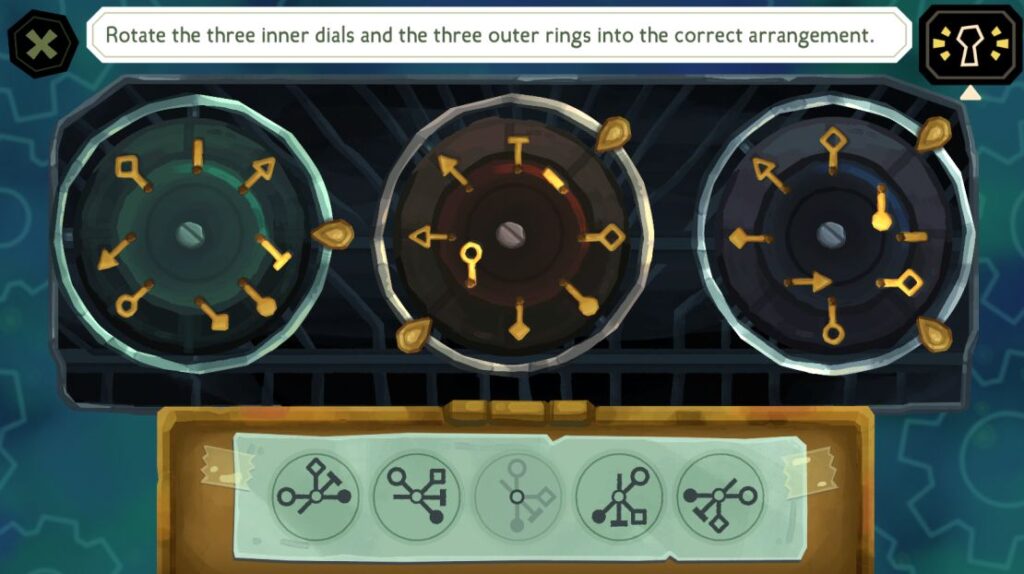
Adjust all three dials and their outer notches until the symbols are positioned like this:
- Open circle: 12 o’clock
- Diamond: 3 o’clock
- T symbol: 5 o’clock
- Closed circle: 6 o’clock
You’ll need to rotate both the inner symbols and the outer rings before everything lines up correctly.
Reward: Handwritten Letter
Compasses (Engine Room)
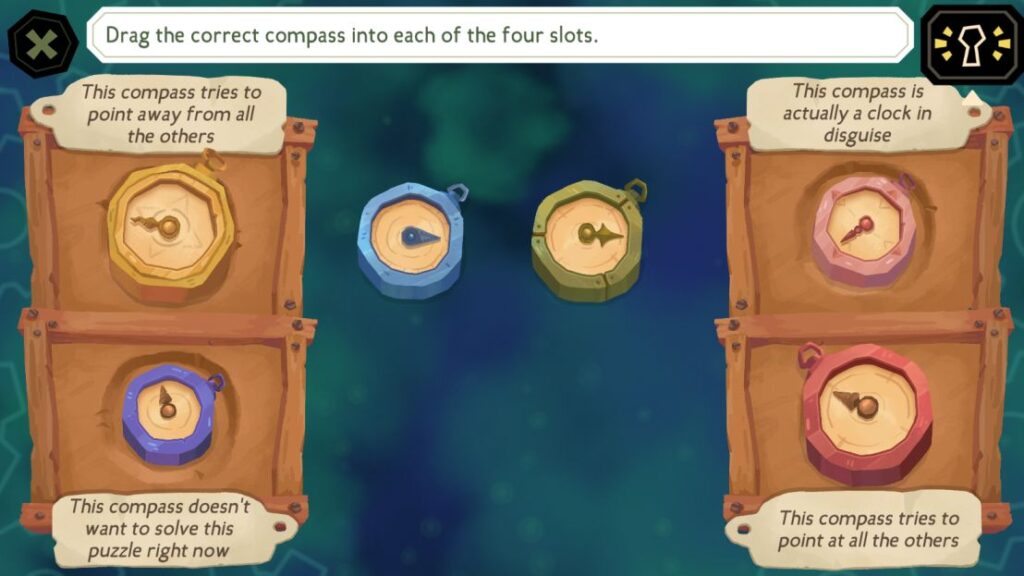
Location: Find the group of compasses beside the “Sale on Now” sign inside the Engine Room.
Each colored compass has a different behavior. Read the descriptions carefully and match every compass to the correct clue.
Solution:
Use these matches:
- Yellow Compass: Points away from every other compass.
- Purple Compass: Doesn’t want to solve the puzzle right now.
- Pink Compass: Is actually a clock in disguise.
- Red Compass: Points toward all the other compasses.
Once every description matches the correct compass, the puzzle is complete.
Reward: Ocean Map
Pin Board (Cargo Hold)
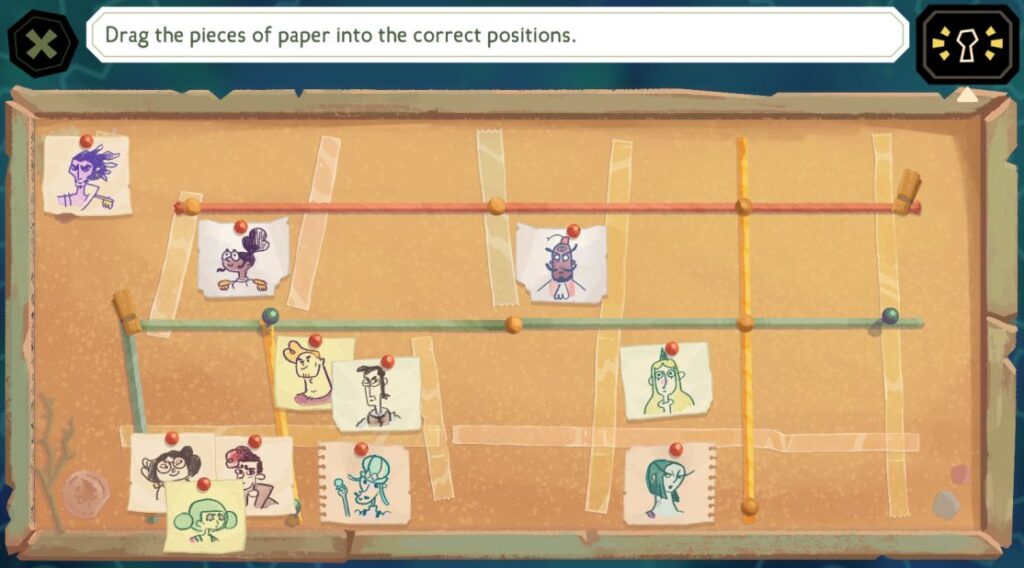
Location: Inside the Cargo Hold after speaking with Mariana Moon.
This puzzle will only unlock if you’ve talked to Mariana.
Your task is to place every character portrait where they are currently located in the story.
Solution:
Arrange the portraits like this:
- Sally should be with Mariana in the Cargo Hold.
- Grimoire should also be with Mariana in the Cargo Hold.
- Magnus should not be placed on any square. Leave his portrait off the map.
The puzzle ends as soon as every portrait is in the correct location.
Reward: Moon Photo
Diving Helmet (Airlock Grotto)
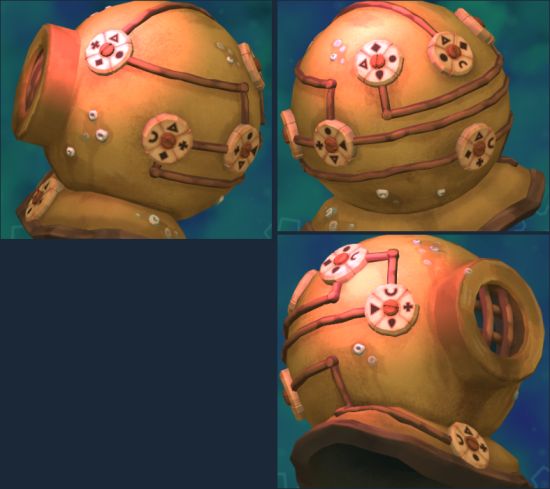
Location: Check the top shelf on the left side of the Airlock Grotto.
This puzzle contains several connected dials. Every connection must match where two dials touch.
Solution:
- Rotate each dial one at a time.
- Watch every connection point carefully.
- Continue rotating until every touching edge matches the neighboring dial.
There isn’t a fixed rotation order. Focus on matching every connection instead of solving one dial by itself.
Reward: Pocketbook
Switch (Bilge)
Location: At the entrance to the Bilge.
You’ll need Dirk’s cell phone first because it works as a flashlight inside this dark area.
This is one of the most difficult puzzles since it relies heavily on experimentation.
Solution:
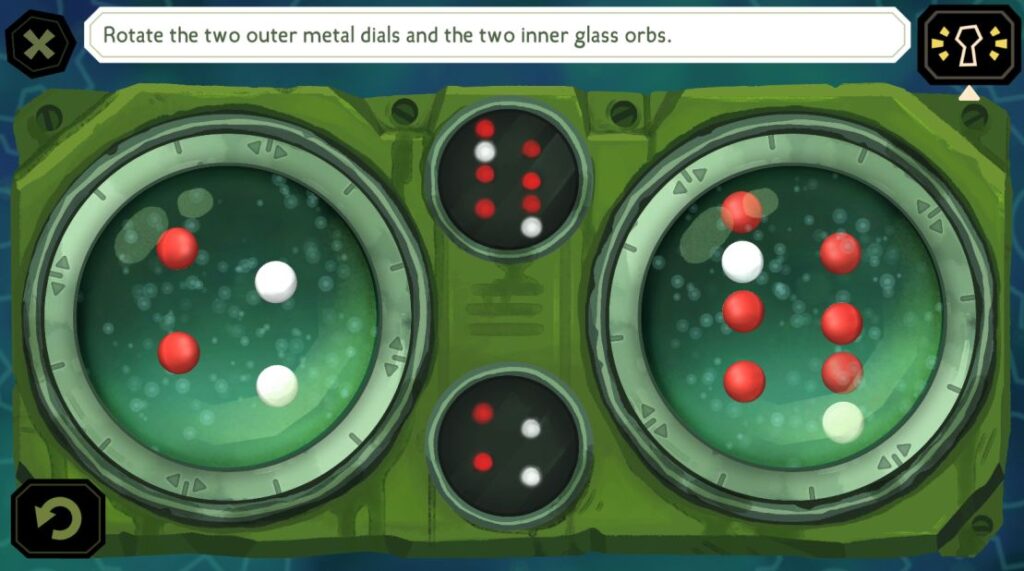
- Rotate the dials and move the orbs.
- Compare the orb positions with the pattern shown in the center.
- Both the orbs and the dials can be rotated.
- Keep adjusting them until one of the displayed center patterns is recreated exactly.
There isn’t a single shortcut for this puzzle. You can do some trial and error before everything clicks into place.
Reward: Access to the Bilge
Wooden Panel (Illusion Theater)
Location: Inspect the wooden panel on the left wall inside the Illusion Theater.
This puzzle only unlock when you have asked Wirman about the Illusion Poster.
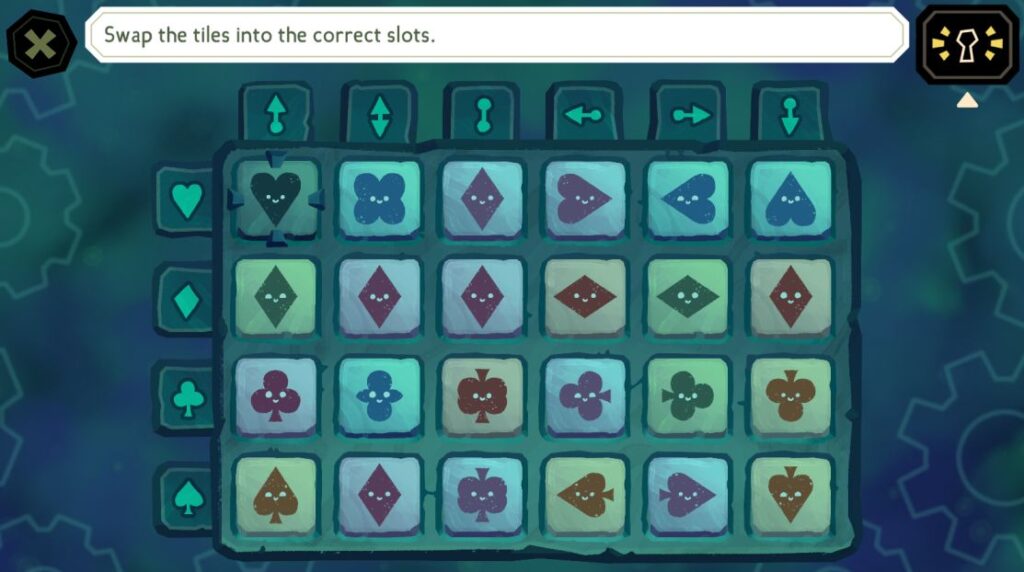
The board contains several slot tiles. You have to place every slot so it matches the direction shown at the top of each tile.
Solution:
- Move the slot pieces around the board.
- Check the direction indicator at the top of every tile.
- Keep rearranging the slot until each one matches the required orientation.
Once every slot is facing the correct direction, the puzzle is complete.
Reward: Lifesize Doll and Film Projector
Mushroom Puzzle Box (Cargo Hold)
Location: Inside the tent in the Cargo Hold.
This puzzle is locked until you report to Sinthia.
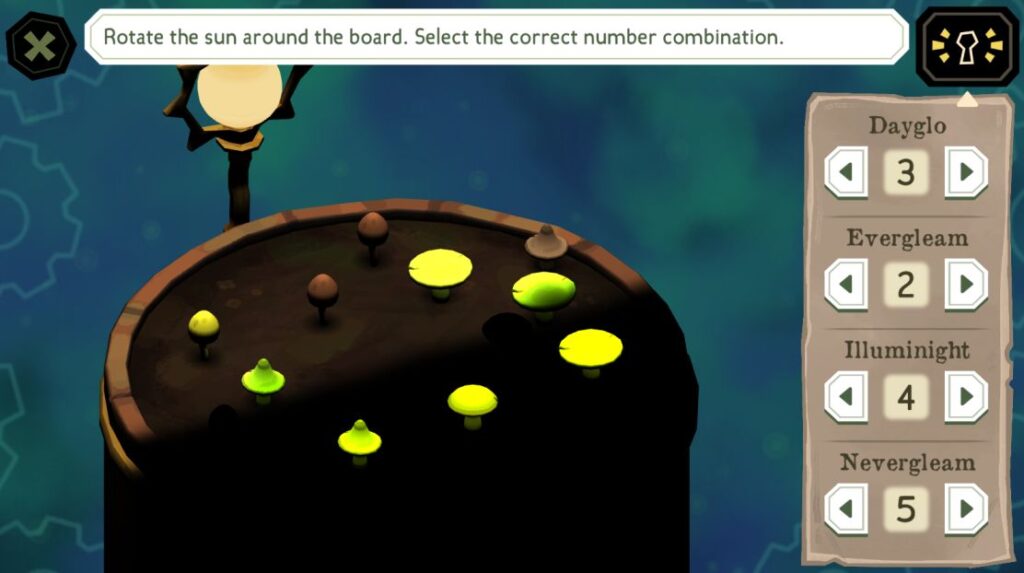
You’ll need to rotate the sun to switch between day and night. Watch how every mushroom reacts to the light, then count how many belong to each type.
Mushroom Types:
- Dayglo: Glows only when sunlight touches it.
- Evergleam: Always glows, both day and night.
- Illuminight: Dark during the day but glows at night.
- Nevergleam: Never glows, regardless of the time.
Solution:
The correct mushroom counts are:
| Mushroom | Count |
|---|---|
| Dayglo | 3 |
| Evergleam | 2 |
| Illuminight | 4 |
| Nevergleam | 5 |
Enter these values to finish the puzzle.
Reward: Another Dictaphone Tape
Electronic Panel (Control Room)
Location: On the wall beside the jacket display inside the Control Room.
Like the previous puzzle, this one only appears after reporting to Sinthia.
You’ll be sliding weighted tiles across the panel. The position of each piece changes its angle.
Solution:
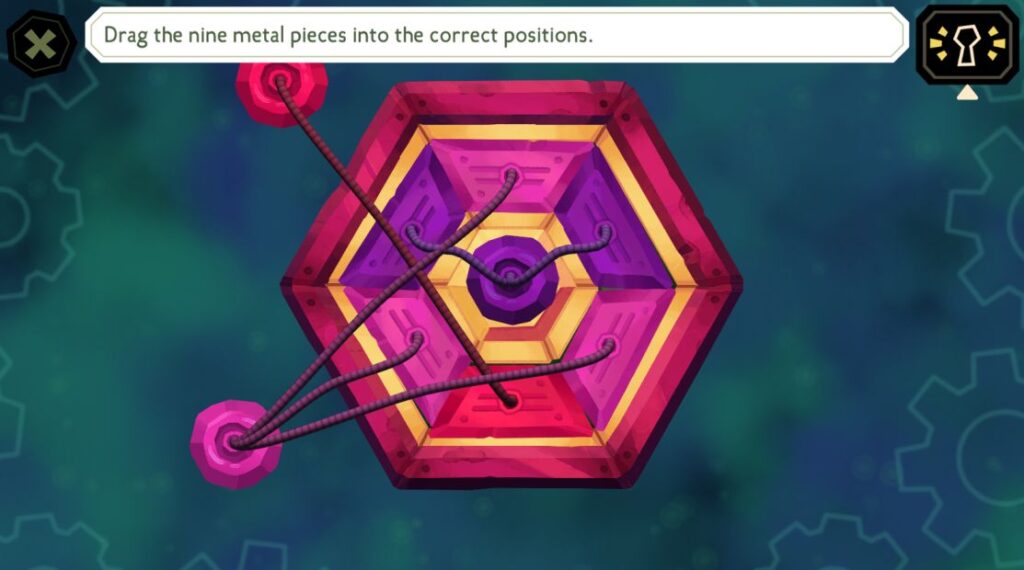
- Drag every tile into a new position.
- Move the weights to adjust each tile’s angle.
- Listen carefully while placing pieces.
- A soft buzzing sound means a tile is close to its correct position.
This puzzle doesn’t have a fixed move list. Use the sound and tile angles to find the correct arrangement.
Reward: Handheld Radio
Treasure Chest (Dome Tank)
Location: On top of the rocks in the middle of the Dome Tank.
This puzzle also unlocks after reporting to Sinthia.
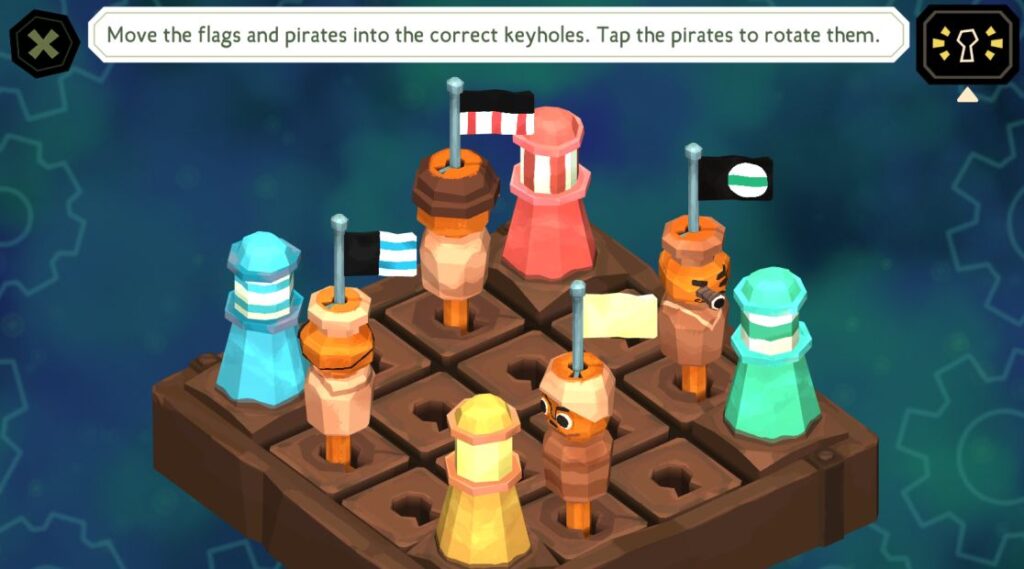
You’ll need to identify which pirate matches each flag. After that, rotate every pirate so they’re looking toward the tower with the same flag color.
Solution:
Match each pirate like this:
| Tower | Pirate |
|---|---|
| Blue Tower | Pirate wearing an eyepatch |
| Red Tower | Pirate wearing a hat |
| Yellow Tower | Pirate with a clear field of vision |
| Green Tower | Pirate holding a spyglass |
After matching them, rotate each pirate so they’re facing the correct colored tower.
Reward: Ocean Treasure
Skull Shelf (Cabinet of Curiosities)
Location: Inside the Cabinet of Curiosities.
You can reach this room by opening the hidden passage behind the bookshelf in the Dream Chamber.
This puzzle becomes available after you’ve reported to Sinthia.
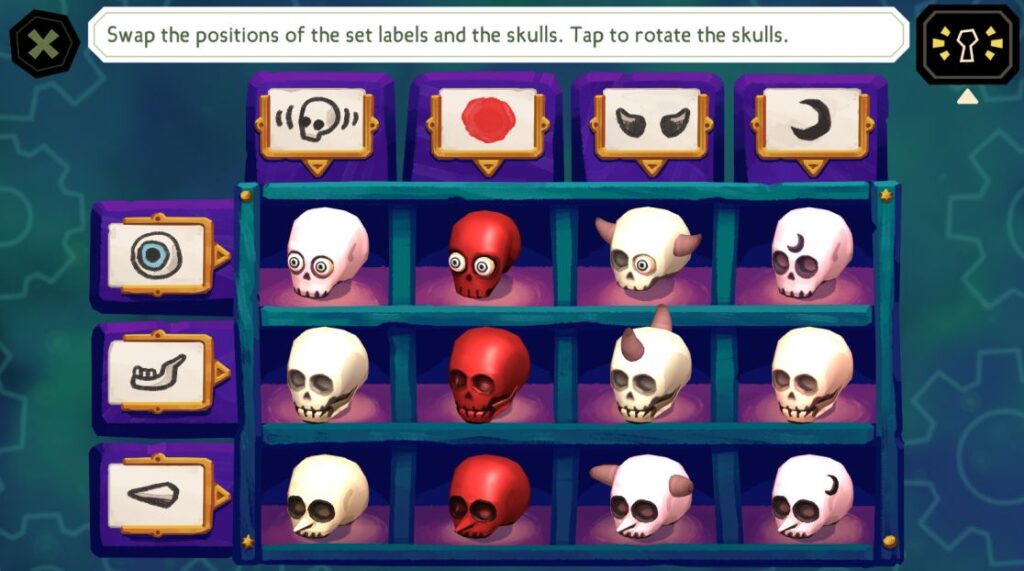
Your task is to organize both the skulls and their labels into the correct grid.
Solution:
- Move every skull into its proper position.
- Rearrange the labels so they match the correct skulls.
- Four skulls already show visible features such as their eyes, jaws, and noses.
- The remaining characteristics should be placed as the labels across the top of the grid.
Keep adjusting both the skulls and labels until the entire chart is accurate.
Reward: Mermaid’s Tongue
FAQs
Can you miss any puzzle rewards?
No. Every puzzle reward can still be collected as long as you continue the story and revisit the required location.
Which puzzle is the hardest?
For most players, the Electronic Panel, Model Town, and Switch are the most difficult because they don’t provide obvious solutions.
Do puzzle rewards matter?
Yes. Several rewards are required to unlock new rooms, interact with characters, or continue the main story.
Most puzzles in The Mermaid Mask can be solved by paying close attention to the clues hidden in the environment or dialogue. A few of them rely on trial and error, while others have fixed solutions like the ones listed above.
If you’re stuck on any puzzle, use the matching section in this guide and continue the story without missing any important items or progression.